Cabinet Repairs Forum home - Go back to Cabinet Repairs
|
Television and Radio Cabinet Restoration part 2
|
|
« Back ·
1 ·
Next »
|
|
|

|
Location: Albury, NSW
Member since 1 May 2016
Member #: 1919
Postcount: 2048
|
Television and Radio Cabinet Restoration part 2
Hello all !
Well here we are once agian and as you can see I'm still using my kitchen as a workshop !
Previous post regarding this project are linked here.
Part 1 of vintage TV and radio cabinet
https://vintage-radio.com.au/default.asp?f=14&th=29
Stains and Grains
https://vintage-radio.com.au/default.asp?f=14&th=28
:How to know what veneer is on your Radio cabinet
https://vintage-radio.com.au/default.asp?f=14&th=26
: Paint stripper Awareness and warning
https://vintage-radio.com.au/default.asp?f=14&th=27
: How to determine what finish is on your cabinet
https://vintage-radio.com.au/default.asp?f=1&th=1186&offset=2#9741
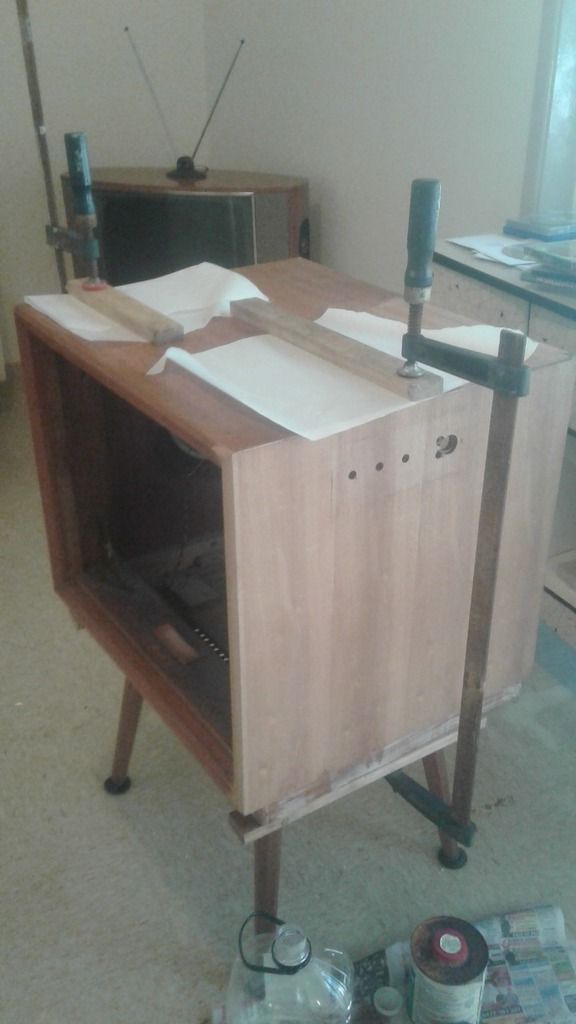
The spitting veneers are now all repaired , Apart from the small missing bits which we will do together here so you can see how that all comes together again.
The CRT and chassis has been removed and its over with Ian now for assessment and repair ,,,,he's probably got the CRT propped up at the bottom of the bed watching old movies on it and waiting for me to finish the cabinet !!
After my last post in part 1.
I tried to think of a common Item that would be in everybody's home ,That could be used as a Veneer Hammer, well after trying many Items I discovered that the back spine of a DVD case works fantastic! In fact it works better than a veneer Hammer , because you put one hand on the back of it to control the preussure and the other hand ontop and just drag it towards you and the veneer is flat and bubble free.! I Found that the double cases worked the best with the discs left in for stiffness.
So there ya go ! You can save a Bob.
The Veneer on the right side of the cabinet had a 6" bubble in it due to some water damage in the past and now its all repaired apart from some small missing veneer that we will repair together here and if anybody is interested I will do a post on how to lay a full sheet of veneer about the size of a complete top of a radiogram etc etc ,
But that will be after this project if there is any interest.
The veneer on this Cabinet has been a long process to repair , because its not the normal one piece veneer,
It is 4 inch wide like planks ,so there are 5 seam joins per side or surface ,all required to be re -glued. One or two at a time and 5 hours under a clamp each one.
So that slows things down a hell of a lot.
Speaking of which , if you need those 4 feet clamps I use ! Supercheap auto sells them and there Dirt cheap!
I wanted to put something in writting that may help a person, who has never done anything like this in their life before.To get a clearer understanding of the thickness of veneers and the sanding of them .
Now I can say, oh ,The veneer is 0.6 mm thick ,But this might be hard for some people to imagine ,, if they have never done anything like this before.
So this way might be a better way to think about the thickness of veneer.
When I removed the Veneer off the right hand side of the cabinet to repair it !.
It's about as thick as 1 peice of 320 grit sand paper !
So as you can imagine there is not much extra material left to play with other than the necessary sanding we need to do, when sanding down grain fillers etc etc. There's a bit more, but not much.
This thickness does change on items and it also depends on the Era and where the veneers are from.
Asia has the thinnest cuts of veneers in world and Australia has been buying them for a long time.
Other considerations to think about too are,, that Small Timber Radios and Items like jewellery boxes often use exotic veneers in the Burl cut and they can be very thin!
You may have seen these veneers at swap meets etc etc, they are bit like Sushi paper, they are that thin.
BTW if you need to patch up a radio with an exotic burl veneer TRENT TIMBERS, would probably be your first stop to buy a rare veneer. But make sure your sitting down when he gives you the price.
Some 1930s veneers are often thicker and this maybe due to the machinery at the time.I dont know the answer to that one.
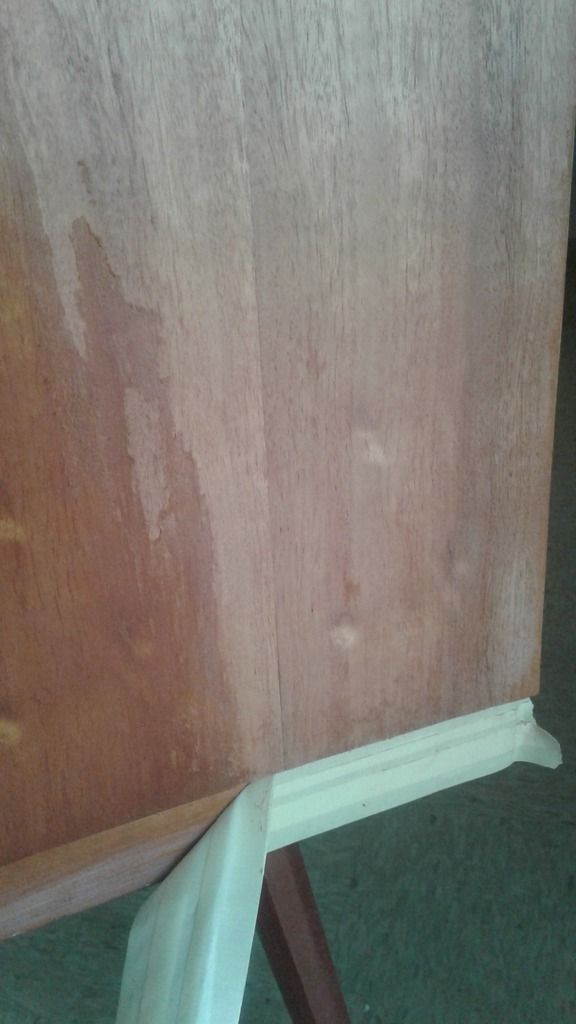
SAFER MASKING.
Sometimes we want to save a part of the cabinet that is in great old condition and we might not want to re finish that part ,but would rather save it, to give it some age to the cabinet,
If so , than it will need to be masked up. Its always risky, but the best way to do it is to lay car pollish down first a couple of times and not rub the last coat off and there for the tape will remove the polish and not the finish
See photo of just polish coming off.my intention is not to save the finish on the skirt, its just to show how to if you need too.
Note , oil varnish reacts to tape and it makes the varnish sticky!!!
Ok lets start on part 2 !
So at this stage your cabinet
: should have all the loose veneers glued and pressed back down and in place again
: dont worry about the missing veneers we will fix that up later
: the cabinet should still have parts of its untouched original finish still left on the cabinet, so we can match it
:You should also know following about your cabinet
1: the type of finish it is from the Tac test.
Eg shellac, Alcohol base
Eg Nitrocellulose Lacquer base
Eg oil varnish , Turpentine
2: you should have a good indication if its a Dye Stain Or a Pigment stain from your recorded iformation
3: you have recorded a rough guide to the colour of the grain filler and the stain.
If so than we can move to the next step of colour matching and dont be concerned if your not certain if its a Dye or a Pigment stain, because this next test will determine if your right or wrong in your decision regarding those 2 stains.
STAGE 4 COLOUR MATCHING THE ORIGINAL FINISH.
1 On either side of the cabinet on the bottom back corner remove 3 inches of the original finish by using the right solvent that suits your finish base ,As determined in your TAC TEST.
2: Once the 3 inches have been removed and your now down to bare timber, clean it with metho.
3: take your recorded grain filler and stain paper chip from part 1that I mentioned and buy the Timber mate filler in the closest you can match that colour too.
They have about 15 colours to choose from for so it won't be a problem.
Buy the stain you have chosen and the top coat for your finish you have chosen .
4: sand the 3 inch area with 320 sand paper lightly.
5: Because this is only a test and not a permanent stain we are about to perform , you need to wipe the area with a very thin coat of shellac so it will seal the timber and the test stain can be removed again, because shellac is just a sealer and it is Alcohol base it can be removed again easily with metho .
Unfortunately the shellac will alter this test a little, but thats better than not being able to remove the wrong choice in stains.
6 : Mix up your chosen grain filler with a bit of water and wipe it into the pores of the timber.
7: just before it has dried ,scrap it off leaving just the pores filled. Use a rounded edge scraper.
8: lightly sand with 320
9: wipe some of your chosen stain onto the area.
10: roughly paint your clear coat on.
Now compare your 3 inch test area to the rest of the original finish?. You will need to take into consideration
: fading
: nicotine
; dirt
So clean a patch best you can
THE RESULTS
: if the test area is much grainer and the texture is completely different than the original ? Than you got your stain choice wrong ! Its the other way around .
The stain type
EG Dye
EG pigment.
So just buy the correct one.
Now this may sound complicated but in reality it only takes a few minutes to do and it will show you if you have gone wrong and also it will show you the look of the new finish.
This procedure above is Aimed at using a bought over the counter stain.
It will get you close to the original colour as you can get with an over the counter product ,, and a bit of tinkering.
To colour match correctly takes years of practice and mixing techniques and we tint the stains and the clear coats that go on . But you won't need to go to that extreme to get a beautiful Radio cabinet.
STAGE 5 STRIPPING THE CABINET.
WARNING.
When stripping the finish off the side of a cabinet ,NEVER
Go in an upward direction with the paint scraper!
If you do , than its going to catch on the top lip of the Top Veneer and tear it right off the top of the Cabinet!!! Then bad language is going come flying out of the shed and the dog is going to do that slow motion walk with his head to the ground, thinking its his fault.!,
So just go in downward direction when stripping the sides.
: When I'm stripping any cabinet, I have a open bottle of Metho next to me and its not because I'm an Alcoholic, Its because I know that if I see the stripper burning the timber or the timber changing colour , the Metho will stop it instantly.
I also know that if a chunk of stripper lands on my arm or face ,,,,Metho will stop the burning a lot faster than water and then I can wash it off with water.
: Always try to strip the cabinet first in the least most aggressive process.
:Eg Shellac = metho
:Nitrocellulose = Lacquer Thinners or Acetone.
:Oil Varnish = paint and varnish stripper.
:Only strip small areas at a time Eg half a side and when its clean do the other half.
: Always put stipper on with grain , like your painting.
Otherwise it tends to leave stains which a dog to get out.
1: Remove all knobs, glass , plastic , the lot .
2 :no matter what solvent your stripping with , when using steel wool , drag the mess off in one direction, dont try rubbing it off. Just drag it off only going with the gain!!
3 :if using stripper , only leave it on for 3 minutes and then remove it with metho and 000 steel wool and just repeat the process twice or three times rather than burn the veneers.
4: remember only go downwards on the sides with a scraper.
5: when the cabinet is completely stripped of all finishes ,, wipe it all down and clean it with metho.
STAGE 6 INSPECTING THE CABINET.
Once the cabinet is stripped and clean we need to look for problems that will affect the finish out come.
So lets go through them here.
1 Are all the sides now the same basic colour?
If the sides are way too dark and this was NOT how it was originally than it may have had a base coat put on it to even up all the sides?
REMEDY
Cabinets like that are a pain in the butt!
To fix this you make sealer coat to restrict the colour from being absorbed by the timber by diluting your chosen top coats by 50 /50 and using it as a sealer on the bare timber. You than put a light coat on the cabinet sides and choose a pigment stain to go on top of that to get uniform colour on all sides.
A seal coat would be
Shellac 50% metho 50 %
Nitro 50% lacquer thinner 50%
Oil varnish 50% Turpentine 50%
This problem does not happen all the time ,but I put this in here in case it happens to you.
Next we would be looking for
Grey weathered timber that has darken due to loss of finish .
REMEDY,
3 Tea spoons of Oxalic Acid in a small glass of WARM water and do the complete Cabinet so its returned to its natural colour.
Paint it on .
When it dries remove it and neutralise it with metho.
Black marks ,stains etc etc
Are all removed with the above process.
This process opens grain , because its water and will need sanding with 320 at a "later stage, "
Hopefully your cabinet won't have those problems hidding under the top coats ,but if it does then answers are there if you need it.
This TV Cabinet had weather stains or greying from the veneer being exposed to the environment where its finish had fallen off and there for it needed to be bleached to return it to its natural colour before grain filling and staining.
So what we are after here at this stage is good clean cabinet showing even colour across all the timbers.
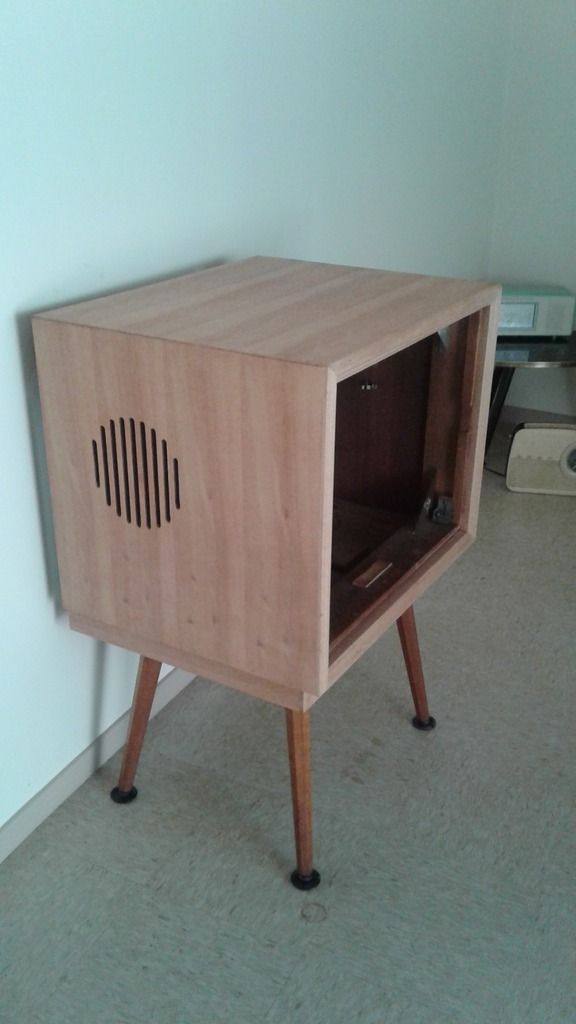
Also a note here regarding Radios and TVs that have the speaker on the side.
This is a very vulnerable area for de -laminating .
The ones that are in great condition still,,, were sealed with red ox end grain filler and then a coat of varnish to protect the end grain and seal it inside the grill.
The ones that have de laminated were sealed with shellac and shellac offers furniture very little protection, let alone a vulnerable area like the speaker cut out. It will not protect it from water or moisture. Shellac is not a good finish if we are looking to protect an Item.
Out of the 3 traditional finishes, it is oil Varinsh that offers us the best protection and this is why they paint vintage Boats in it.
So we want to seal up inside that Grill very well.

Thats all folks until part 3 which will be Grain filling , leveling, Staining.
Pete
|
|
|
|
|

|
Location: Sydney, NSW
Member since 28 January 2011
Member #: 823
Postcount: 6933
|
Excellent work and great tips there Pete, although I frown when I see that white masking tape. Horrible stuff. I only use Scotch Blue which comes off cleanly even after a few days.
|
|
|
|
|
|
|
Location: Albury, NSW
Member since 1 May 2016
Member #: 1919
Postcount: 2048
|
Hi G,
The blue reacts with oil Varnish and so I use Polish under them all.
Sometimes I put metal tape ontop of the masking Tape too if theres a lot of stripper about.
Pete
|
|
|
|
|
|
|
Location: Sydney, NSW
Member since 28 January 2011
Member #: 823
Postcount: 6933
|
The blue reacts with oil Varnish
I see. I don't use varnish myself very often as I'm not into wooden cabinets all that much, although I have some vintage office intercoms with wooden cases that need re-coating.
When painting around the house, I've wasted a lot of time in years gone by with the common-or-garden white tape wiping and scraping off the residual glue from it, which is why I stopped using it.
|
|
|
|
|
|
|
Location: Albury, NSW
Member since 1 May 2016
Member #: 1919
Postcount: 2048
|
Yeah the blue is fine for the others and even nitro ,But it reacts with oil varnish and makes it go sticky and it never dries again.
Any tape is risky so I put polish under them all and I use panel beating tape also.
Ps I found this old speaker box with a as new 12 inch in it from late 50s or early 60s.
It would make a great 50s Guitar Amp .
I will put it on VR in a few days so you can see it.
All the best pete
|
|
|
|
« Back ·
1 ·
Next »
|
|
You need to be a member to post comments on this forum.
|

|
|


