
General Discussion
Forum home - Go back to General discussion
|
Tasma 1005 Restoration
|
|
|
Return to top of page · Post #: 1 · Written at 5:44:50 PM on 16 December 2013.
|
|

|
Location: Perth, WA
Member since 19 November 2008 Member #: 381 Postcount: 240 |
|
Now that I have finished my Tasma 1001 restoration I'll make a start on my 1005. 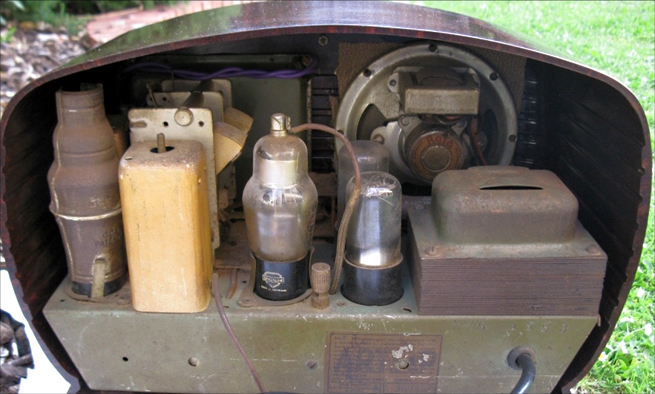 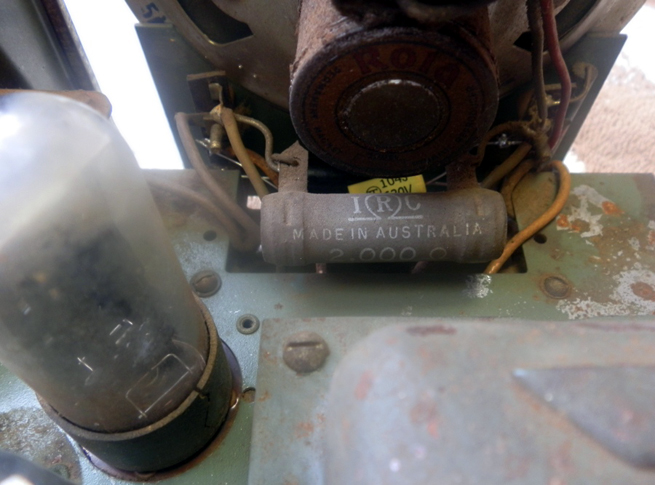  |
|
|
Return to top of page · Post #: 2 · Written at 8:30:50 PM on 17 December 2013.
|
|
|
|
Location: Bathurst, NSW
Member since 7 August 2008 Member #: 336 Postcount: 412 |
|
Lovely radio and a significant model in the Tasma range. |
|
|
Return to top of page · Post #: 3 · Written at 9:17:09 PM on 17 December 2013.
|
|

|
Location: Wangaratta, VIC
Member since 21 February 2009 Member #: 438 Postcount: 5720 |
|
I have a Tasma that has just come in an is about number 3 in the radio repair line. Not same model as that as the tuner is rear centre, However, it is covered in what you will likely find, and is quite common, fat. |
|
|
Return to top of page · Post #: 4 · Written at 10:12:51 PM on 17 December 2013.
|
|
|
|
Location: Melbourne, VIC
Member since 20 April 2013 Member #: 1331 Postcount: 94 |
|
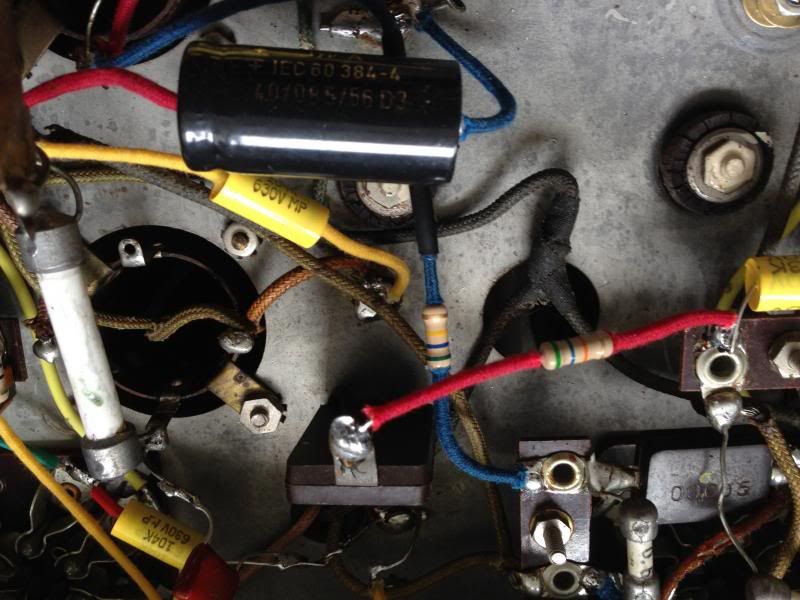
Hi there its George I sold you this Tasma I don't think there is anything to do to it as it had most components replaced I should know. |
|
|
Return to top of page · Post #: 5 · Written at 8:17:35 AM on 18 December 2013.
|
|
|
|
Location: Somewhere, USA
Member since 22 October 2013 Member #: 1437 Postcount: 896 |
|
Restoration could mean different things to different people George |
|
|
Return to top of page · Post #: 6 · Written at 10:52:33 AM on 18 December 2013.
|
|
|
|
Location: Wangaratta, VIC
Member since 21 February 2009 Member #: 438 Postcount: 5720 |
|
Big resistor is likely acting as the choke? |
|
|
Return to top of page · Post #: 7 · Written at 11:23:45 AM on 18 December 2013.
|
|
|
|
Location: Somewhere, USA
Member since 22 October 2013 Member #: 1437 Postcount: 896 |
|
Ah makes sense .. if the field coil was good but the choke was stuffed. |
|
|
Return to top of page · Post #: 8 · Written at 7:22:37 PM on 18 December 2013.
|
|
|
|
Location: Wangaratta, VIC
Member since 21 February 2009 Member #: 438 Postcount: 5720 |
|
Not a good spot for wandering fingers (then if you stick them in such places ... tough) but ideal for cooling. |
|
|
Return to top of page · Post #: 9 · Written at 12:37:29 AM on 19 December 2013.
|
|
|
|
Location: Somewhere, USA
Member since 22 October 2013 Member #: 1437 Postcount: 896 |
|
If that's a comma I'm going to say field coil speaker replaced |
|
|
Return to top of page · Post #: 10 · Written at 9:53:14 AM on 19 December 2013.
|
|
|
|
Location: Wangaratta, VIC
Member since 21 February 2009 Member #: 438 Postcount: 5720 |
|
The circuit says that replacement should be 2K for a Permag speaker. Make sure if there is a set of taps on the transformer it is on the appropriate one. I have mounted them on a tag strip on the inner side of the pan. |
|
|
Return to top of page · Post #: 11 · Written at 4:39:44 PM on 19 December 2013.
|
|
|
Location: Melbourne, VIC
Member since 20 September 2011 Member #: 1009 Postcount: 1263 |
|
I have a Tasma 710 radio, which is a earlier dual wave 5 valve version (same cabinet) of the 1005, dating from about 1940. |
|
|
Return to top of page · Post #: 12 · Written at 7:32:33 PM on 24 December 2013.
|
|
|
|
Location: Perth, WA
Member since 19 November 2008 Member #: 381 Postcount: 240 |
|
Hi George, |
|
|
Return to top of page · Post #: 13 · Written at 8:19:36 PM on 24 December 2013.
|
|
|
|
Location: Perth, WA
Member since 19 November 2008 Member #: 381 Postcount: 240 |
|
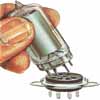
Dont tell the Wife, but the best way I have found to clean IF cans and tuning capacitors is stick them in the Dishwasher. Coils taken out of cans and the tuning capacitor well greased after drying. Use conductive electoronic grease on the capacitor |
|
|
Return to top of page · Post #: 14 · Written at 1:55:48 PM on 26 December 2013.
|
|
|
|
Location: Somewhere, USA
Member since 22 October 2013 Member #: 1437 Postcount: 896 |
|
What dishwashing product is it Gary? |
|
|
Return to top of page · Post #: 15 · Written at 4:06:04 PM on 26 December 2013.
|
|
|
|
Location: NSW
Member since 10 June 2010 Member #: 681 Postcount: 1408 |
|
I have used the dishwasher to clean variable caps - works quite well. Any automatic dishwasher product should be OK as they work in this application because both the aluminium plates and the zinc plated steel frame react with the alkaline solution. Just seems to brighten them up without pitting or stripping off the plating. |
|
|
You need to be a member to post comments on this forum.
|
|

Sign In
Vintage Radio and Television is proudly brought to you by an era where things were built with pride and made to last.
DISCLAIMER: Valve radios and televisions contain voltages that can deliver lethal shocks. You should not attempt to work on a valve radio or other electrical appliances unless you know exactly what you are doing and have gained some experience with electronics and working around high voltages. The owner, administrators and staff of Vintage Radio & Television will accept no liability for any damage, injury or loss of life that comes as a result of your use or mis-use of information on this website. Please read our Safety Warning before using this website.
WARNING: Under no circumstances should you ever apply power to a vintage radio, television or other electrical appliance you have acquired without first having it checked and serviced by an experienced person. Also, at no time should any appliance be connected to an electricity supply if the power cord is damaged. If in doubt, do not apply power.
Shintara - Keepin' It Real · VileSilencer - Maintain The Rage