
Restoring an ARC Victor for a friend and colleague
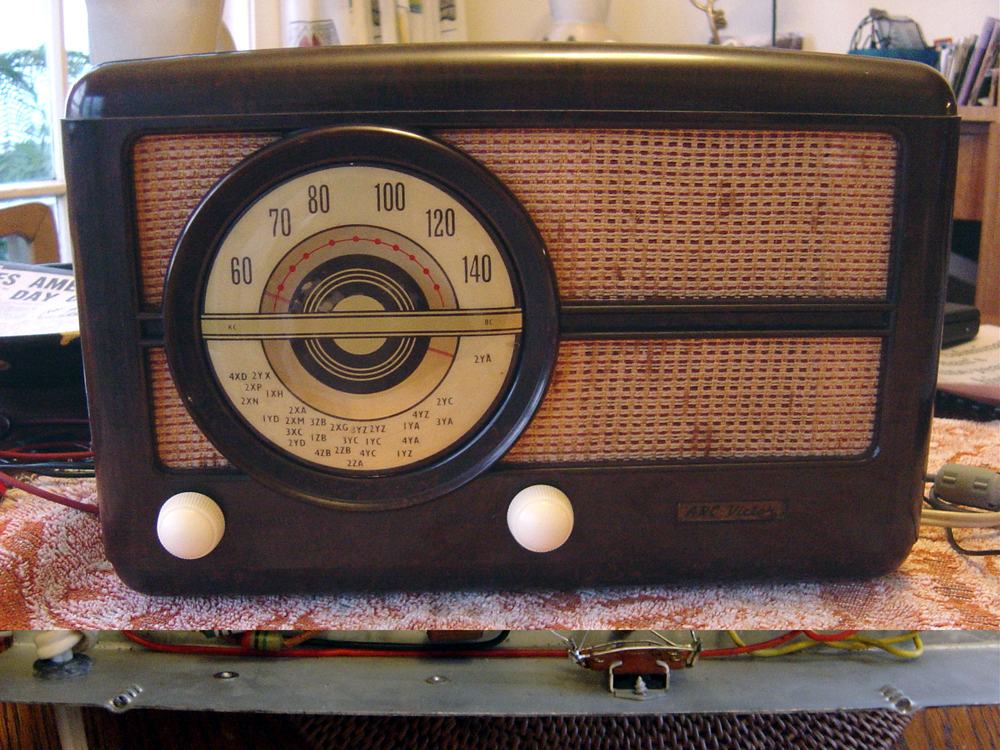
Written by John Roberts (Member: Pentagrid) on 30th September, 2010.This is a nice little brown radio type 5154. Not sure who the manufacturer is but there's a stylised GB with New Zealand underneath and a seven-digit number.
It's a five-valve receiver sporting: ECH42; 6BA6; 6AV6 & 6AQ5. A 6X4 supplies the HT.
I was first asked to fix to fix the set some months previous and this was easy as the 6AQ5 had a white top. A new valve and I got some welcome noises. The sound was rather distorted but as we were in a concrete/steel building I put this down to lack of signal.
However, my friend thought it sounded "a bit rough", as a radio producer she has a very good ear. Then it decided to make cracking noises only so it was time for some serious investigation.
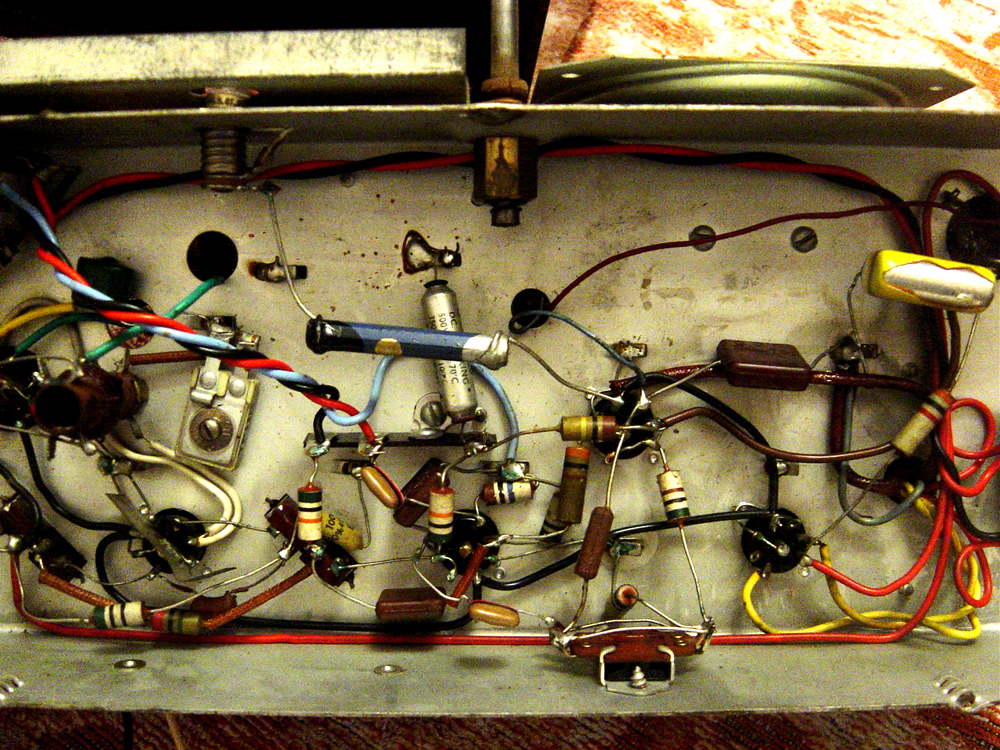
As can be seen, the chassis is clean and uncluttered. There had been work done on this before, I'm sure the cap with the broken shell wasn't original and why was 0.47µF - bypass on the HT line? Maybe some instability had developed?
Anyway, I removed the cap and switched on. After a short time I had soft hum, lots of crackles and little else. I noted the multi section cap was a venerable Ducon unit and was exuding some black stuff; I removed it from circuit and, using three caps (thanks NZVRS) and a tagstrip, made a new filter section. Instead of 50/50/10µF, I now had 47/47/20, which I reckoned should be close enough. (The 20µF cap was connected to the 6X4 cathode). I had HT in the places HT should be, less hum than before..... and nothing else!
I started measuring voltages I found some 15-odd volts on the 6AV6 plate. Now I'm not very familiar with triode preamps but thought this figure was too low. This point is fed from the HT via a 100K resistor, bypassed with a .02µF to ground then through a 5.1kΩ resistor to the plate. There is another bypass here, a brown square "Simplex" device with no discernable markings. The two resistors measured high so I replaced both and got nothing. Swapped the 6AV6 for a known good one, nothing. Switch off, measure plate�ground resistance and it showed in the hundreds of Megs. Patch my CD player directly into the grids and got sound. Not as loud as I would have expected but clean.
Another more careful listen and found I could hear very quiet and distorted stations which changed as the tuning knob was turned - that seemed to rule out the ECH42 and its associated bits. Maybe the IF stage? But the voltages seemed logical; there was appropriate resistance in the IF transformer windings and another known good 6BA6 made no difference. This was getting me down.
I have to admit I was a bit thrown so I busied myself replacing the volume control whose on/off switch had packed up - someone had used one of the tags as an anchor point. This was done, other high resistors replaced and still no useable stations.
I measured the voltage on the 6AV6 plate and saw it down to some six or seven volts. As a complete guess I tried disconnecting the bypass from the 6AV6 plate, switched on and got stations! Lovely, distortion-free, loud stations and 70 volts or so on the plate. Studied the brown offender and could just make out 100 written in dark red. If this beastie was an RF bypass I reckoned 100pF would be correct. Even though the set sounded fine, I replaced the bypass anyway.
Here is a shot of the chassis at this stage.
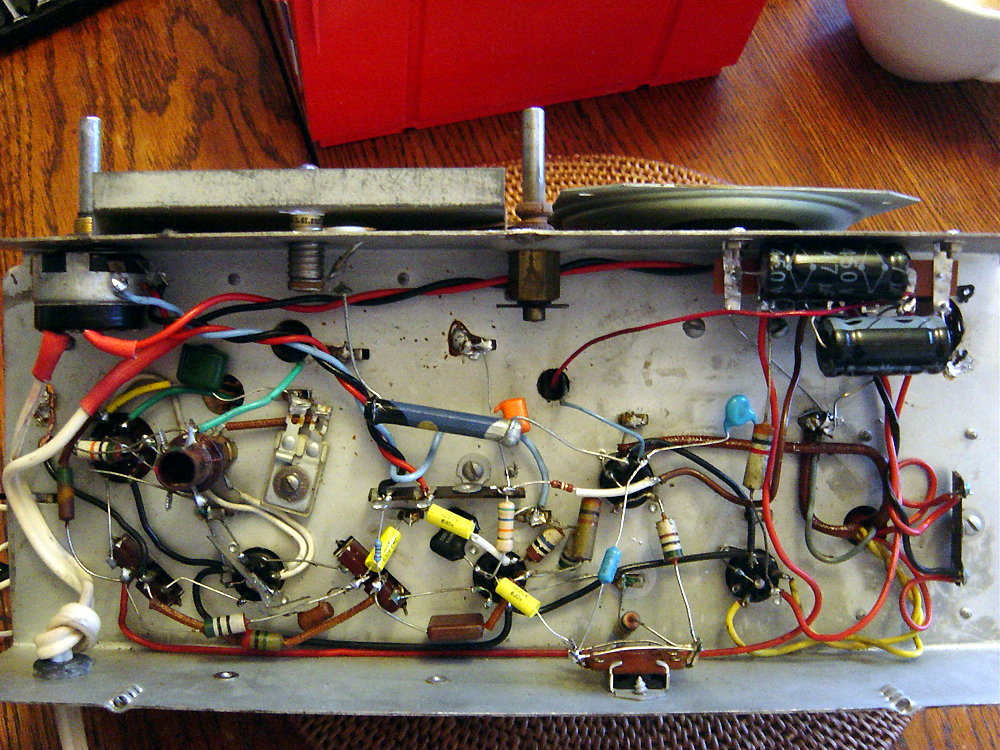
This was great. The white knobs got a spin in the sonic bath, the dial pointer got a fresh coat of red metallic paint and everything was reassembled. I didn't have to do anything to the plastic cabinet, it was in very good condition and the owner had kept it very clean.
Items used in the restoration:-
2x 47µF 400V capacitors		2 @ $3.50 =	$7.00
1x 20µF 400V capacitor				$1.50
2x 0.01µF 630V capacitors		2 @ $0.50 =	$1.00
1x 0001µF 630V capacitor				$0.50
2x 0.02µF 400V capacitors		2 @ $0.50 =	$1.00
1x 680pF 400V capacitor				$0.50
1x 5.6K 1/2W resistor					$0.20
1x 100K-1/2W resistor					$0.20
1x 47K 1/2W resistor					$0.20
1x 1 Meg 1/2W resistor				$0.20
1x 1-meg switch pot					$5.00
1x rubber grommet					$0.05
1x Tagstrip						$1.15
Total							$18.50
Work done:-
Replace all power supply capacitors. The present three-in-one unit was working but it was oozing a black rubbery substance - even though things were OK now, they soon wouldn't be. I've left the old unit in place but disconnected to avoid leaving an ugly hole in the chassis.
Replace all bypass capacitors. Sure, only one was faulty, but others of similar age could give trouble.
Replace resistors, which had increased in value too much. They do this when they age.
Replace the volume control. This control was working well and probably would have continued to do so. However, the existing control did have an associated on-off switch, which had failed. The back contacts were simply used as tie points for the mains feed to the transformer. As I had a suitable pot on hand, I replaced it.
Replaced the cord-entry grommet. This was done for safety reasons as the old one had perished, allowing the power cord to rub on its entry hole in the chassis.
Sign In
Vintage Radio and Television is proudly brought to you by an era where things were built with pride and made to last.
DISCLAIMER: Valve radios and televisions contain voltages that can deliver lethal shocks. You should not attempt to work on a valve radio or other electrical appliances unless you know exactly what you are doing and have gained some experience with electronics and working around high voltages. The owner, administrators and staff of Vintage Radio & Television will accept no liability for any damage, injury or loss of life that comes as a result of your use or mis-use of information on this website. Please read our Safety Warning before using this website.
WARNING: Under no circumstances should you ever apply power to a vintage radio, television or other electrical appliance you have acquired without first having it checked and serviced by an experienced person. Also, at no time should any appliance be connected to an electricity supply if the power cord is damaged. If in doubt, do not apply power.
Shintara - Keepin' It Real · VileSilencer - Maintain The Rage