
Tech Talk
Forum home - Go back to Tech talk
|
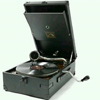
Loop Antenna
|
|
|
« Back ·
1 ·
Next »
|
|
|
Return to top of page · Post #: 1 · Written at 9:06:22 AM on 9 July 2017.
|
|
|
Location: Latham, ACT
Member since 21 February 2015 Member #: 1705 Postcount: 2228 |
|
With my fiddling with the Chieftain it has come to my attention that I dont entirely know how a loop antenna works. So I am asking if any of you have the time could you write a fairly indepth explanation as I am sure I am not the only one thats not real sure. Oh and how to count Valve pins as I have rather embarasingly learnt how to do this . |
|
|
Return to top of page · Post #: 2 · Written at 9:25:19 AM on 9 July 2017.
|
|

|
Location: Wangaratta, VIC
Member since 21 February 2009 Member #: 438 Postcount: 5715 |
|
The circular valve pins are normally read clockwise from the spigot in Octals, the gap in miniatures looking at the base, after that you look at the data on somewhere like "Franks electron tube pages"or the Philips "Miniwatt Technical data". There are traps like Octals where 2&7 are normally heaters, but there are a few ferals where that is not so: Assume nothing. Even after 50 years of fixing, the data book is my friend |
|
|
Return to top of page · Post #: 3 · Written at 9:40:22 AM on 9 July 2017.
|
|

|
Location: Hill Top, NSW
Member since 18 September 2015 Member #: 1801 Postcount: 2253 |
|
normally read clockwise |
|
|
Return to top of page · Post #: 4 · Written at 11:07:52 AM on 9 July 2017.
|
|
|
|
Location: Belrose, NSW
Member since 31 December 2015 Member #: 1844 Postcount: 2710 |
|
Yes Carl you now know how to count valve pins. Clockwise from underneath. |
|
|
Return to top of page · Post #: 5 · Written at 11:18:17 AM on 9 July 2017.
|
|
|
|
Location: Latham, ACT
Member since 21 February 2015 Member #: 1705 Postcount: 2228 |
|
Its a very interesting read actually. |
|
|
Return to top of page · Post #: 6 · Written at 5:37:36 PM on 9 July 2017.
|
|
|
|
Location: Milton, NSW
Member since 27 June 2016 Member #: 1945 Postcount: 56 |
|
Not sure if I am speaking out of turn here but I think there is a small weeny error in Ian's earlier post, being an old retired computer engineer I can't speak of all ICs but certainly for RTL, DTL, TTL and CMOS IC's they are measured anti-clockwise from the top. Viewed from the top the dot in the top left hand in the encapsulation identifies PIN 1, from there go anti-clockwise. AFAIK this applies to analogue IC's as well. |
|
|
Return to top of page · Post #: 7 · Written at 7:15:59 PM on 9 July 2017.
|
|
|
|
Location: Belrose, NSW
Member since 31 December 2015 Member #: 1844 Postcount: 2710 |
|
Just checking you were paying attention! |
|
|
Return to top of page · Post #: 8 · Written at 9:37:34 PM on 9 July 2017.
|
|
|
|
Location: Wangaratta, VIC
Member since 21 February 2009 Member #: 438 Postcount: 5715 |
|
It really is a case of being on the ball: You can get caught out. The old UX4 sockets were numbered clockwise looking at "base or wiring side" but you could easily get tricked by the fact that many were top wired & then it goes counter clockwise. Philips "P" base is one that goes the other way. |
|
|
Return to top of page · Post #: 9 · Written at 10:26:21 AM on 10 July 2017.
|
|
|
|
Location: Latham, ACT
Member since 21 February 2015 Member #: 1705 Postcount: 2228 |
|
"Oh yes. The loop also forms a DC path to the AGC line or ground for grid 3 on the mixer valve - 1R5 in your case. Without this path the grid floats around all over the place with either no signal, noise or other strange unexpected results." |
|
|
Return to top of page · Post #: 10 · Written at 4:04:54 PM on 10 July 2017.
|
|
|
|
Location: Belrose, NSW
Member since 31 December 2015 Member #: 1844 Postcount: 2710 |
|
Absolutely. |
|
|
Return to top of page · Post #: 11 · Written at 12:41:28 PM on 14 July 2017.
|
|
|
|
Location: Oradell, US
Member since 2 April 2010 Member #: 643 Postcount: 839 |
|
If you need to replace a loop antenna, or want it bigger to make the radio more sensitive: |
|
|
Return to top of page · Post #: 12 · Written at 8:15:07 PM on 15 July 2017.
|
|
|
|
Location: Wangaratta, VIC
Member since 21 February 2009 Member #: 438 Postcount: 5715 |
|
Just be very careful as to how the set is laid out. I have seen a few examples where a loop has been allowed to extend into an un-shielded zone (and the odd wire). This oversight has resulted in the loop picking up the internal radiation & using it to destabilise the whole show (oscillation) |
|
|
Return to top of page · Post #: 13 · Written at 11:39:38 PM on 21 December 2017.
|
|
|
|
Location: Somewhere, USA
Member since 22 October 2013 Member #: 1437 Postcount: 896 |
|
For any DIP IC the dot marking pin 1 is bottom left and count anti-clockwise from there. |
|
|
Return to top of page · Post #: 14 · Written at 12:05:39 AM on 22 December 2017.
|
|
|
|
Location: Somewhere, USA
Member since 22 October 2013 Member #: 1437 Postcount: 896 |
|
The characterising attribute of a magnetic loop antenna is that they are sensitive to the magnetic component of a radio wave, |
|
|
Return to top of page · Post #: 15 · Written at 9:00:00 PM on 7 April 2026.
|
|
|
|
Location: NSW
Member since 10 June 2010 Member #: 681 Postcount: 1407 |
|
Come across this thread as I am presently adapting a loopstick antenna to my STC 830. Started off by isolating the variable capacitance end of the original aerial coil (secondary of the aerial transformer) and patching in an old loopstick. The coils had about the same inductance as the original aerial coil so figured I was in with a chance. |
|
|
« Back ·
1 ·
Next »
|
|
|
You need to be a member to post comments on this forum.
|
|
 bigpond.com" if not I can possibly round one up, if you're interested.
Sign In
Vintage Radio and Television is proudly brought to you by an era where things were built with pride and made to last.
DISCLAIMER: Valve radios and televisions contain voltages that can deliver lethal shocks. You should not attempt to work on a valve radio or other electrical appliances unless you know exactly what you are doing and have gained some experience with electronics and working around high voltages. The owner, administrators and staff of Vintage Radio & Television will accept no liability for any damage, injury or loss of life that comes as a result of your use or mis-use of information on this website. Please read our Safety Warning before using this website.
WARNING: Under no circumstances should you ever apply power to a vintage radio, television or other electrical appliance you have acquired without first having it checked and serviced by an experienced person. Also, at no time should any appliance be connected to an electricity supply if the power cord is damaged. If in doubt, do not apply power.
Shintara - Keepin' It Real · VileSilencer - Maintain The Rage