
Tech Talk
Forum home - Go back to Tech talk
|
Hotpoint M65ME - 'hav a look and see wot ya think, plug it in and it hums.....'
|
|
|
« Back ·
1 ·
Next »
|
|
|
Return to top of page · Post #: 1 · Written at 6:16:30 PM on 26 June 2016.
|
|

|
Location: Adelaide, SA
Member since 27 February 2010 Member #: 630 Postcount: 398 |
|
Hi All 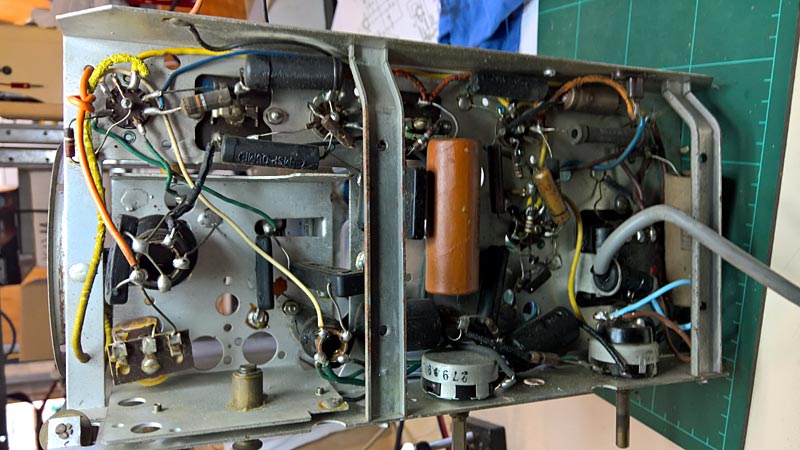 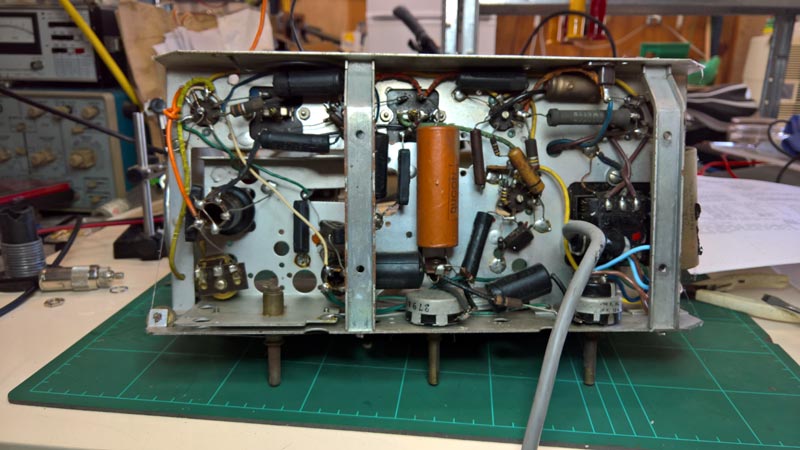 So to even get this thing working at taken me about 4hrs work. Lucky that all coils, Transformers and speaker metered ok (Megger and DVM used where needed). Once all that was taken care of I was able to power up slowly checking the power transformer as I wound it up to mains (Variac). With the basic power supply good I inserted the valves and started checking, it came to life of sorts but the audio was very bad, the speaker cone had come away from the frame and rattled. This was sorted with a smear of Rubber cement around the edge of the cone and frame. The alignment is way off and reception seems deaf. I have to restring and do a full alignment but ran out of time today. ‾‾‾‾‾‾‾‾‾‾‾‾‾‾‾‾‾‾‾‾‾‾‾‾‾‾‾‾‾‾‾‾‾‾‾‾‾‾‾‾‾‾‾‾‾‾‾‾‾‾‾‾‾‾‾‾‾‾‾‾‾‾‾‾‾‾‾‾ Valve radios, They just don't make them like they used to |
|
|
Return to top of page · Post #: 2 · Written at 9:42:42 AM on 27 June 2016.
|
|
|
|
Location: Melbourne, VIC
Member since 5 October 2009 Member #: 555 Postcount: 471 |
|
Good write-up Flakes ... a timely reminder to interested, but inexperienced radio restorers. This write-up reinforces that these old radios can be worked on safely ... provided ... one learns .... and actively practises safety ... and has a little bit of patience. ‾‾‾‾‾‾‾‾‾‾‾‾‾‾‾‾‾‾‾‾‾‾‾‾‾‾‾‾‾‾‾‾‾‾‾‾‾‾‾‾‾‾‾‾‾‾‾‾‾‾‾‾‾‾‾‾‾‾‾‾‾‾‾‾‾‾‾‾ Cheers, Ian |
|
|
Return to top of page · Post #: 3 · Written at 2:50:10 PM on 27 June 2016.
|
|

|
Location: Wangaratta, VIC
Member since 21 February 2009 Member #: 438 Postcount: 5733 |
|
I wonder if this was the same guy that had worked on the Healing I had recently? Similar faults. |
|
|
Return to top of page · Post #: 4 · Written at 9:45:28 PM on 27 June 2016.
|
|

|
Administrator
Location: Naremburn, NSW
Member since 15 November 2005 Member #: 1 Postcount: 7643 |
|
Photos uploaded. ‾‾‾‾‾‾‾‾‾‾‾‾‾‾‾‾‾‾‾‾‾‾‾‾‾‾‾‾‾‾‾‾‾‾‾‾‾‾‾‾‾‾‾‾‾‾‾‾‾‾‾‾‾‾‾‾‾‾‾‾‾‾‾‾‾‾‾‾ A valve a day keeps the transistor away... |
|
|
« Back ·
1 ·
Next »
|
|
|
You need to be a member to post comments on this forum.
|
|
Sign In
Vintage Radio and Television is proudly brought to you by an era where things were built with pride and made to last.
DISCLAIMER: Valve radios and televisions contain voltages that can deliver lethal shocks. You should not attempt to work on a valve radio or other electrical appliances unless you know exactly what you are doing and have gained some experience with electronics and working around high voltages. The owner, administrators and staff of Vintage Radio & Television will accept no liability for any damage, injury or loss of life that comes as a result of your use or mis-use of information on this website. Please read our Safety Warning before using this website.
WARNING: Under no circumstances should you ever apply power to a vintage radio, television or other electrical appliance you have acquired without first having it checked and serviced by an experienced person. Also, at no time should any appliance be connected to an electricity supply if the power cord is damaged. If in doubt, do not apply power.
Shintara - Keepin' It Real · VileSilencer - Maintain The Rage