|
HMV 537 - Chassis Type A 536 D/S
|
|
« Back ·
1 ·
Next »
|
|
|

|
Location: Montreal, CA
Member since 16 October 2015
Member #: 1809
Postcount: 7
|
Hello.
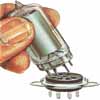
Back in 1988, I inherited an HMV 537 BCB-shortwave model radio (the maroon bakelite cabinet version) which since then has operated well without any hum or serious issues.
However, as it became obvious that I was having to replace the 6J8 tube more often than I thought was reasonably necessary, I am now planning to have the presumably dried-out electrolytic capacitors and any other aging components replaced in order to extend life expectancy to the set.
I am puzzled, though, about what appears to be the two rear, centrally-located, female sockets, either of which are presumably there to accept an external speaker or headphone jack.. It appears to be the letters "P U" underneath the sockets in the photo but on my chassis this lettering has been scratched off.
See the following webpage for a rear chassis photo of the wooden cabinet version - same circuit characteristics:
http://www.radiomuseum.org/r/hismasters_537.html
What is the type of male plug or jack I will need to connect to accommodate the external speaker or perhaps it is indeed for headphones? I assume it would be a vintage Australian or perhaps U.K. type jack.
Does such a jack even exist anymore or will I be obliged to have the socket drilled out and modified to accept something similar such as the standard 3.5 mm mono jack which, by the way, is too wide to fit through and the 2.5 mm mini-mono jack which is too narrow and loose.
Perhaps someone reading this would be so kind as to mail me a spare they do not need which has been lying around in their junk box? 
I could, of course, have one of the existing sockets drilled out or add an entirely new socket elsewhere on the chassis, but would prefer not to do this. Note that on my chassis there is no toggle switch to the right of the sockets as is shown in the photo of the wooden cabinet version.
Another question: is the purpose of the "WARNING - Mains voltage adjustment" removable plate there to permit the option of changing the mains input to the North American 110 volts A/C--not that I intend to do this as, despite the fact I live in Canada, I have been using one of those inexpensive, handy 220-110 volt transformers into which I plug the radio. I would prefer to keep everything as original as possible, within reason.
I will appreciate any comments and suggestions from anyone else familiar with this radio's quirks and characteristics.
Thanks.
Newslogger
|
|
|
|
|
|
Location: Melbourne, VIC
Member since 20 September 2011
Member #: 1009
Postcount: 1263
|
|
|
|
|
|

|
Location: Hill Top, NSW
Member since 18 September 2015
Member #: 1801
Postcount: 2256
|
The P.U. stands for Pick Up, meant for a record player, but I suppose you could connect a microphone if you wanted a weird retro PA system. In this radio it is wired in at all times, so you'd have to tune the dial to an empty part of the band. So, in other words, it's an input and not the output you are looking for.
The speaker is a 3.7 ohm unit, and has feedback to the volume control to reduce distortion. Connecting another speaker in parallel, or a different impedance could upset that arrangement. I've seen some radios that have extension sockets, where they simply have a 0.1μF capacitor connecting the anode of the output valve (6V6 in your case) to the speaker. Probably not entirely safe, but that's how it was done then.
|
|
|
|
|
|
Location: Latham, ACT
Member since 21 February 2015
Member #: 1705
Postcount: 2236
|
You might not be aware that you can also plug a Bluetooth receiver into the pick ups so you can easily run your mp3s or Tablet audio . I have done this with great success but as I have been advised check for high tension on the jack before you do so ( as this would kill whatever you plug in ) . The reason why I say bluetooth receiver is because if you plug your tablet directly into it then the tablet will think its running earphones and play at low volume as I have done.
|
|
|
|
|
|
|
Location: Montreal, CA
Member since 16 October 2015
Member #: 1809
Postcount: 7
|
Thank you all for your very helpful comments and suggestions.
Yes, I had tracked down Kevin Chant's schematic webpage for the HMV 537 but not the Service Manual, so I do appreciate that link.
Now that I realise the purpose of those rear sockets, I will leave them intact even though it is very unlikely I will ever want to use the radio as an amplifier. No point in creating a potential problem.
Not sure now if I really want to drill another hole in the chassis for an external speaker connection.
I had an idea to place this radio on top of an old, gutted, vintage 1930 RCA R-15 radio cabinet into which I have mounted a large speaker thus giving it some useful purpose other than collecting dust.
The empty, internal bottom "shelf" of the R-15 would be the ideal spot to place the 220-110 transformer safely out of the way as well.
Anyway, I will soon be bringing the HMV 537 to a local service tech to have those aging components replaced. Looks like he will have quite a job ahead of him considering the way everything is so jam--packed inside the chassis.
Thanks again!
|
|
|
|
|

|
Location: Wangaratta, VIC
Member since 21 February 2009
Member #: 438
Postcount: 5720
|
I would perhaps submit a photo of the inside of the pan to see what is in it? I rarely replace 6J8 & a procession of them suggests that there is something seriously wrong in it's circuit components.
They may be causing the valve to cease working and the valve is not faulty at all?
Marc
|
|
|
|
|
|
|
Location: Montreal, CA
Member since 16 October 2015
Member #: 1809
Postcount: 7
|
Yes, Marcc,
I hadn't thought of taking any under-chassis photos for the technician to ponder over, but I'm sure he will figure it out through the service manual as he has done repair work for me in the past.
The capacitors--indeed all of the components--are original and some have greasy surfaces so it's a safe bet they've reached the end of the road after nearly 70 years.
The radio's single owner passed away at age 99 and used it from 1948 right up to the end. No cracks in the cabinet, either, so I was more than happy to receive it to keep it alive and working thousands of miles from its original home.
I did manage to track down the station IDs and locations of the call letters indicated on the broadcast band dial and when listening to shortwave, I could often hear Radio Australia on it from here.
Once the HMV 537 is back from the shop, I will report the results.
Thanks.
|
|
|
|
|
|
|
Location: Wangaratta, VIC
Member since 21 February 2009
Member #: 438
Postcount: 5720
|
Those "greasy" things are waxed paper capacitors and at this point in time & having no substantial work done on the set, the path to resurrection is clear.
A lot of that stuff around that era had rubber coated wire & I have had one in the last couple of years, with even the original, deteriorated rubber type mains lead. How the guy never got killed, or it started a fire will never be known. It was a daily driver & came to me, as it started to hum.
With yours, it would have to have every strand of wire like that removed, or made safe; Every wax paper and Electrolytic capacitor replaced, and the resistors checked & replaced if faulty, as you go.
That's minimum, if the output & Mains transformers are OK.
Sometimes you can be lucky. I did a welfare call on a late 1920's(?) "King" Neutrodyne Friday, that ceased making enough noise. Fortunately, the speaker wire had only fallen out of it's terminal. Surprised it made any noise at all? But sometimes if its got an OP transformer, it will rattle at the right tempo. For info it was a Lyric transformer; Tuner 4 gang; mains; 71A says AC filament on some valves, Lyric did that 71A was released 1927.
With yours, Not so simple. I would hope you still have the 6J8's. It might be worth testing them? Once the radio is refurbished & re calibrated. Bad caps cause lots of problems.
Marc
|
|
|
|
|
|
|
Location: Montreal, CA
Member since 16 October 2015
Member #: 1809
Postcount: 7
|
The 6J8Gs that died in the HMV 537 included both brand new and used ones which, when tested later, showed obvious deterioration although there was never any audio hum which would clearly have indicated dead or dying electrolytics. The only symptom was weak reception which improved when I replaced the tube each time.
I still have a few used, major brand name 6J8G spares which rate "good" on my Jackson 648A tester. Strangely, there is no existing substitute for this tube nor even a Russian-made source. I have only just learned about the vintage, military CV859 equivalent--long discontinued. Not sure I would want to plug the similar 6K8 in the 6J8G's place without learning about someone else's experience using it in this particular HMV model.
Certainly a capacitor's appearance can be deceiving--greasiness or melted wax notwithstanding--but considering the relative low cost and ease of replacing them and with considerably smaller-sized types, it is best to err on the side of caution by upgrading.
One can become overly obsessive about maintaining "component originality". Restoring vintage radios is not quite the same thing as, for example, resurrecting vintage cars--as if anyone could even purchase their original tires in any case!
Nevertheless, you may find the following website fascinating considering the time and trouble some collectors will invest in such restoration.
http://antiqueradio.org/welcome.htm
and gape in awe at this fascinating YouTube video:
https://www.youtube.com/watch?v=J31nVC0ms0w
It would certainly be nice to have such dedicated technicians living next door!
|
|
|
|
|
|
|
Location: Wangaratta, VIC
Member since 21 February 2009
Member #: 438
Postcount: 5720
|
I quite often find Pentagrids in the other ones hole. 6J8 superseded 6A8 for shortwave sets as the separate Triode exciter in 6J8 maintained oscillation & good modulation to higher frequencies. The two are pin interchangeable but do not expect bandspread, or performance to be the same: Astor JJ is one that compresses the band.
ECH35 is also found in the 6J8 hole, but you must make sure that pin one is grounded and has nothing but a ground on it.
Leaking caps can feed positive onto the control grid and they become more like a diode & that stresses them. Pentagrids tend to like volts and resistances gone high, starving them of volts, will cause them to stop, or provide weak modulation. That translates in to no, or poor volume.
Marc
|
|
|
|
|
|
|
Location: Montreal, CA
Member since 16 October 2015
Member #: 1809
Postcount: 7
|
Having just received the HMV 537 back from the service shop, no less than 7 capacitors and 2 resistors had to be replaced--mostly vintage Ducons which had clearly served beyond their life-expectancy.
My assumption that no component repairs were made prior to my possession of the radio was incorrect. I should have realised this, of course, since both the rear protective panel and the top cap of one of the tube shields was missing. In addition, one of the bakelite cabinet's rear screw hole shafts had been cracked which now required that a longer screw be driven into what remained of it.
When I first obtained the radio in 1988, it had been unceremoniously dumped on the floor at the back of a closet where, to my dismay, I noticed that the speaker cone was destroyed, presumably by negligence.
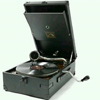
Once I flew the radio home (having carefully packed it in one of my carry-on bags!), I discovered that the 6V6 was dead and the 6B6 and 6J8 very weak. I then replaced the speaker altogether with a similar one that I'd salvaged from an early 1950s portable phonograph which I hadn't used for decades and which fortunately also contained a working 6V6.
Once I managed to purchase a new 6J8 and replacement 6Q7 for the discontinued 6B6, the radio worked fine with good audio, sensitivity, and remarkably with no hum--the usual telltale result of bad electrolytics.
After a few years of ongoing tube changing, however, I stopped using the radio until recently when I found the time to have it properly checked out and repaired as necessary. So far it is working as it should and the cabinet is polished to a gleam.
I am curious about the material used for the missing back panel as shown in the following website depicting the near-identical model having only the medium wave, broadcast band.
http://www.radiomuseum.org/r/hismasters_547.html
In the meantime, I may form a panel out of thick cardboard or some alternate, durable substance, but it would be nice to find an original replacement if possible. Perhaps an Australian vintage radio shop might have one gathering dust somewhere as well as a matching top cap for the tube shield?
Presumably, this medium wave, broadcast band-only model had a tone control in place of the BCB-shortwave bandswitch?
|
|
|
|
|
|
|
Location: Montreal, CA
Member since 16 October 2015
Member #: 1809
Postcount: 7
|
Unfortunately, the so-called "banana plugs" I purchased locally are too wide to fit in either of the "P U" sockets on the HMV537's rear chassis.
Incidentally, the left socket is slightly wider than the right one for whatever reason and although it physically accepts the shaft of a standard RCA male plug, the right one does not. In any case, RCA plugs obviously won't solve the issue unless I replace the entire socket panel to accept them.
I have since researched that a "Wander Plug" was the original type of phonograph input required for such radios, and that evidently these have been a standard in the U.K. as well as in Australia and presumably New Zealand.
I assume that the original plug had a double Wander plug on both ends of a cable similar to a double banana plug and was sold to consumers as an option should they want to connect a phonograph having an identical socket.
Does anyone know what the exact part number was back then and if the correct size is still available?
The 1/8 inch and 4mm are, of course, not precisely the same fit. The best solution would be to know of someone who has the same radio or similar model having those perplexing input sockets.
Another question: why is there a badge affixed to the top of the 1947-48 bakelite cabinet marked "Radio Eric Anderson Television" when Australian TV only officially began in 1956? Pretty optimistic advertising considering that your television was in the experimental and test stage up until then.
|
|
|
|
|
|
|
Location: Latham, ACT
Member since 21 February 2015
Member #: 1705
Postcount: 2236
|
Copied and Pasted from the Web 06 May 1950 - Advertising - Trove
ERIC ANDERSON RADIO-TELEVISION Pty Ltd trademarks in Australia
ERIC ANDERSON RADIO-TELEVISION Pty Ltd currently has 1 trademark in Australia associated with it. The filing date for this trademark is 14/04/1949. The specific trademark currently associated with this applicant is shown in the table below.
Trademark Number Description Type Status Lodgement Date
98535 TELE-TONE Word Removed - Not Renewed 1949-04-14
ERIC ANDERSON RADIO-TELEVISION Pty Ltd is one of thousands of trademark owners that we feature on IP in Australia which contains details of the over 1/2 million trademarks registered in Australia.
|
|
|
|
|
|
|
Location: Wangaratta, VIC
Member since 21 February 2009
Member #: 438
Postcount: 5720
|
Exercise caution when dealing with broken out holes in the Bakelite / Catlin / Rigid plastic. Self tapping screws are the enemy and I find to be the cause.
I often re-tap a hole in sets like "Kriesler Bee hives" as they warp. I prefer to drill & tap the hole when going deeper (if you in fact can). Catch 22 is some have Whitworth & others "Dutton", viz American screw gauge. That can cause an issue when re tapping. diameters, thread angle, & pitches are not the same.
Many backs were compressed board which was a cross between "Masonite" & Cardboard & not particularly robust.
When replacing self tapping screws, wind them backwards until you feel a slight click. Then go forward and they should pick up the old thread, not rip out the hole by cutting a new one.
Marc
|
|
|
|
|
|
|
Location: Montreal, CA
Member since 16 October 2015
Member #: 1809
Postcount: 7
|
Regarding the re-threading of screw holes into bakelite radio cabinets, I had no problem doing this as I simply matched up the existing left side screw with another longer screw having an identical thread specification.
Fortunately, all I needed to do was carefully guide and then turn the longer screw into what remained of the half-broken bakelite screw shaft on the right side of the cabinet.
As I mentioned in an earlier post, I could obviously create a new rear panel out of a similar material, but on second thought the heat buildup is so great within the enclosed cabinet space that leaving the panel off is preferable. Besides, I have no small children or pets to which the "open-back" option could pose a hazard.
|
|
|
|
« Back ·
1 ·
Next »
|
|
You need to be a member to post comments on this forum.
|
