
Tech Talk
Forum home - Go back to Tech talk
|
Tecnico 1140 what a bastard of a set
|
|
|
« Back ·
1 ·
Next »
|
|
|
Return to top of page · Post #: 1 · Written at 8:28:50 AM on 24 July 2023.
|
|

|
Location: Latham, ACT
Member since 21 February 2015 Member #: 1705 Postcount: 2230 |
|
Actually it's not so bad once I became a contortionist lol. Valves upsidedown or on their sides. And getting the chassis out of the case. There is a missing sticker that advises to tune the set to 4QL before removing it from the case . That probably means the dial pointer won't get stuck and become a roadblock which it did for me. Then you have to stretch the speaker grill out so the switch shafts won't foul as well. A quick check revealed the speaker tranny was open circuit and thankfully I had a identical one I had pulled out of a trashed Philips chassis. It bolted right in and looks the part. |
|
|
Return to top of page · Post #: 2 · Written at 3:49:28 PM on 27 July 2023.
|
|

|
Location: Werribee South, VIC
Member since 30 September 2016 Member #: 1981 Postcount: 485 |
|
I sympathise with you on that front. |
|
|
Return to top of page · Post #: 3 · Written at 10:00:26 PM on 24 October 2023.
|
|
|
|
Location: Latham, ACT
Member since 21 February 2015 Member #: 1705 Postcount: 2230 |
|
I finally got this set finished. A friend sent me a great 3D printed badge for it. 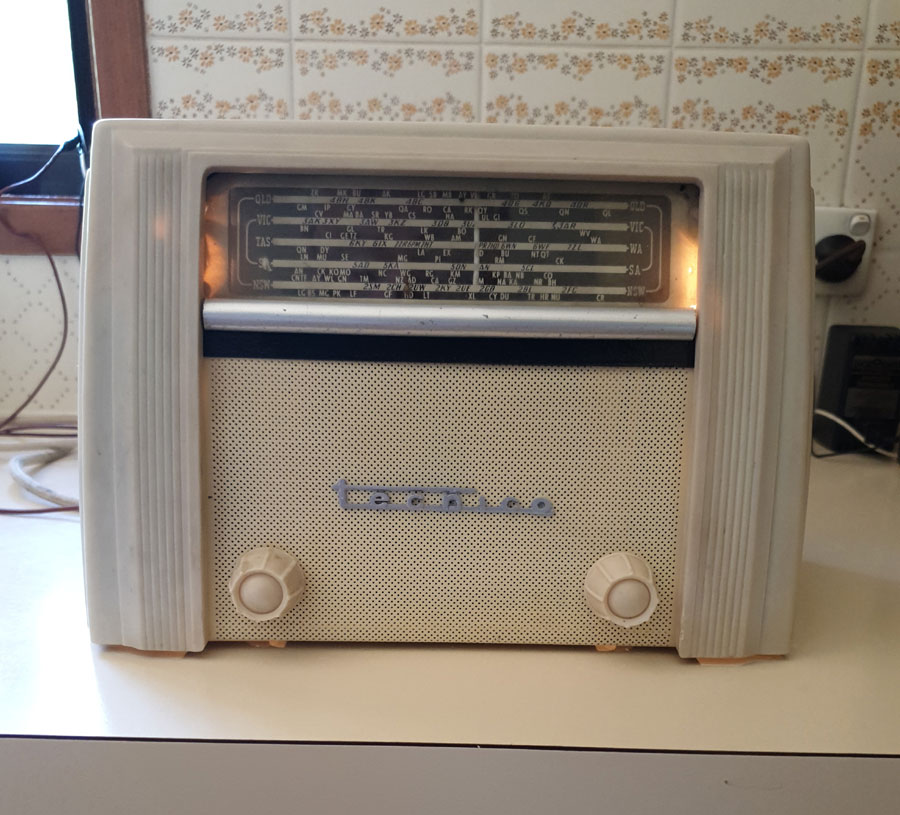 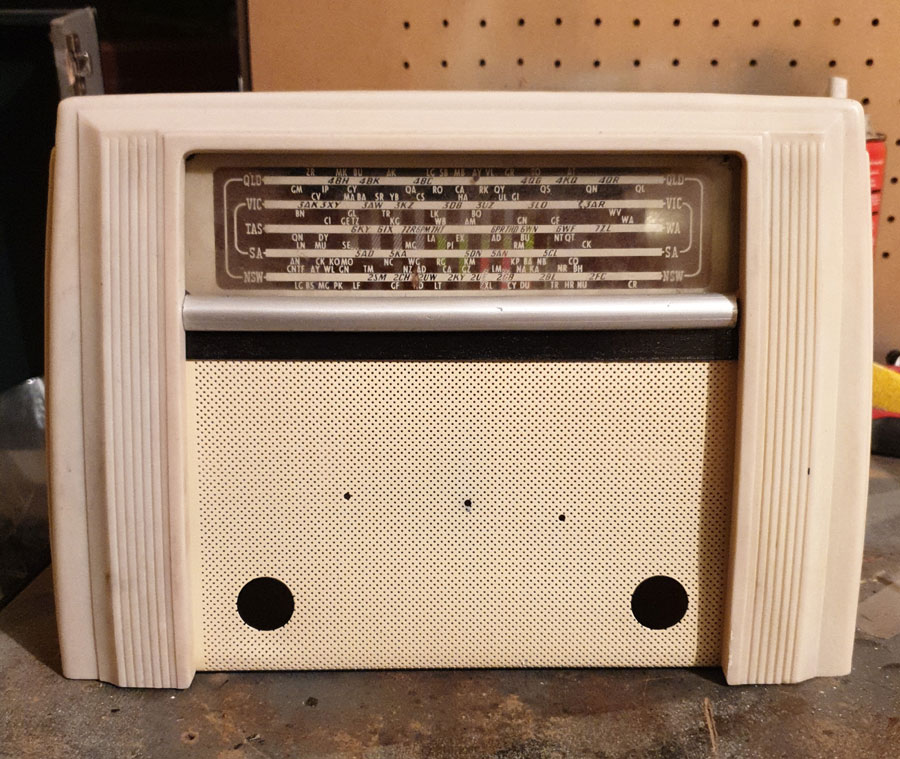 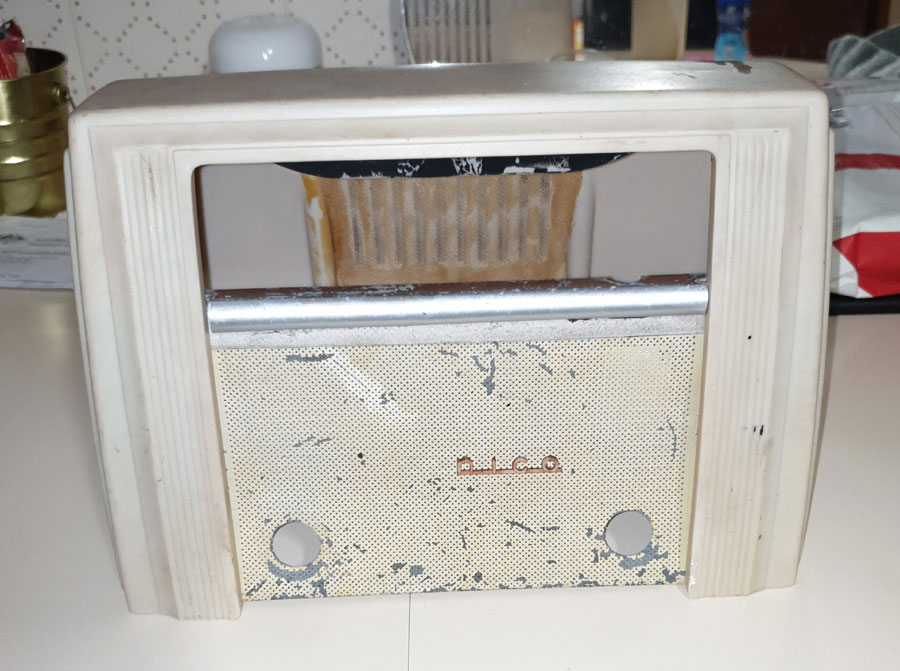 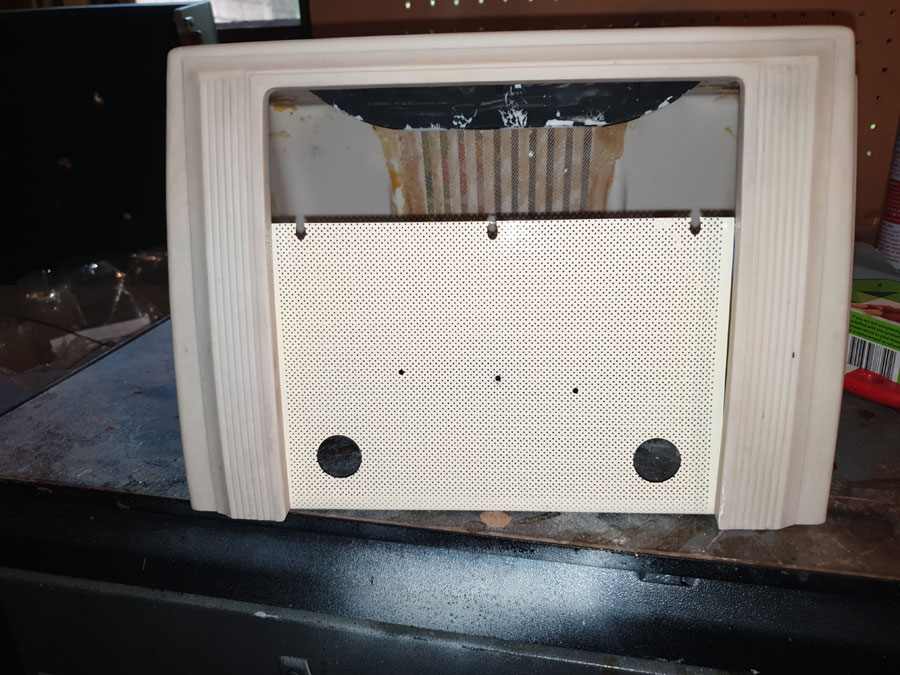 |
|
|
Return to top of page · Post #: 4 · Written at 12:07:00 AM on 25 October 2023.
|
|

|
Location: Wangaratta, VIC
Member since 21 February 2009 Member #: 438 Postcount: 5715 |
|
You young fella's seem to not realise that these things were rarely made with servicing in mind. They were actually in most cases built in layers. The enjoyable ones to fix (sic) are ones like a particular Stromberg Carlson, where they put three caps next to the chassis an then put the coil & switch box assy on top of them. On more than one, an RF coil has had to be removed to get at a dud bit further in. |
|
|
Return to top of page · Post #: 5 · Written at 8:03:51 AM on 25 October 2023.
|
|
|
|
Location: Latham, ACT
Member since 21 February 2015 Member #: 1705 Postcount: 2230 |
|
Hey Marcc I love it when someone calls this 62 year old a young bloke LOL. |
|
|
Return to top of page · Post #: 6 · Written at 9:20:35 AM on 25 October 2023.
|
|
|
|
Location: Wangaratta, VIC
Member since 21 February 2009 Member #: 438 Postcount: 5715 |
|
And my next birthday is 72. I suspect you got into the game late & I started in the sixties. |
|
|
Return to top of page · Post #: 7 · Written at 8:27:49 PM on 26 October 2023.
|
|

|
Administrator
Location: Naremburn, NSW
Member since 15 November 2005 Member #: 1 Postcount: 7624 |
|
Photos uploaded to Post 3. ‾‾‾‾‾‾‾‾‾‾‾‾‾‾‾‾‾‾‾‾‾‾‾‾‾‾‾‾‾‾‾‾‾‾‾‾‾‾‾‾‾‾‾‾‾‾‾‾‾‾‾‾‾‾‾‾‾‾‾‾‾‾‾‾‾‾‾‾ A valve a day keeps the transistor away... |
|
|
Return to top of page · Post #: 8 · Written at 9:58:58 PM on 26 October 2023.
|
|

|
Location: Hill Top, NSW
Member since 18 September 2015 Member #: 1801 Postcount: 2254 |
|
Hmm, I have a Technico that looks exactly like that one, apart from from being a bit beat up. |
|
|
Return to top of page · Post #: 9 · Written at 8:16:31 AM on 27 October 2023.
|
|
|
|
Location: Latham, ACT
Member since 21 February 2015 Member #: 1705 Postcount: 2230 |
|
Robbert is yours the large one or the small one. This is the small one and it's very tedious even putting it back in the chassis. Most of them have broken badges because the metal speaker grill needs to be bent outwards for the knob shafts to clear it. |
|
|
Return to top of page · Post #: 10 · Written at 8:56:19 AM on 27 October 2023.
|
|
|
|
Location: Wangaratta, VIC
Member since 21 February 2009 Member #: 438 Postcount: 5715 |
|
Need more detail with the shafts? These on potentiometers are either too short on the common ones and a damn nuisance if it's splined. 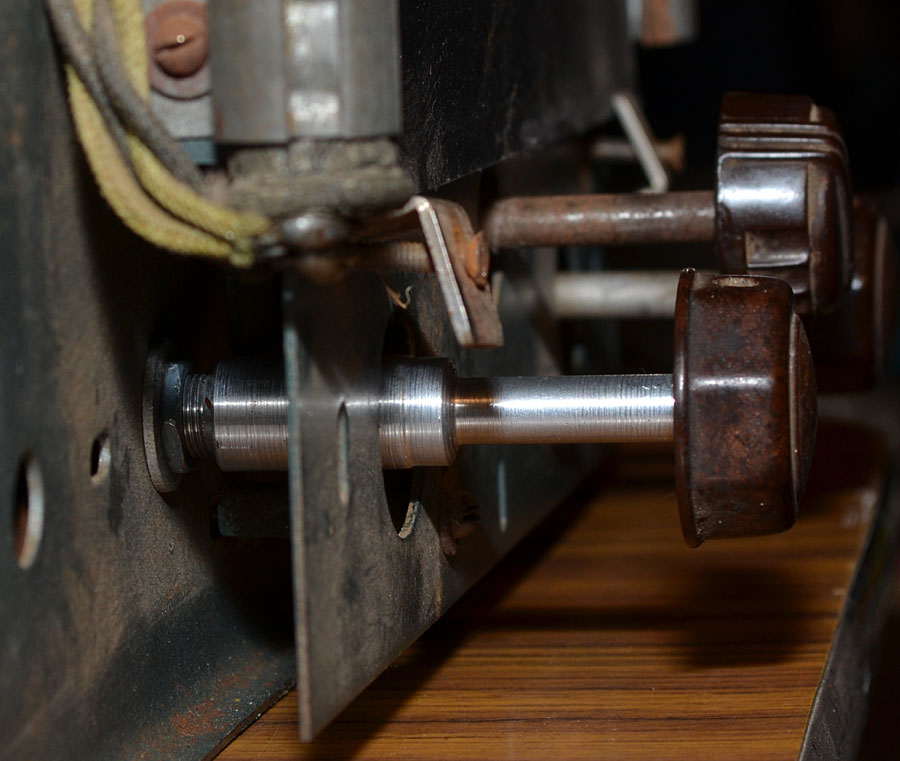 |
|
|
Return to top of page · Post #: 11 · Written at 11:09:40 AM on 27 October 2023.
|
|
|
|
Location: Latham, ACT
Member since 21 February 2015 Member #: 1705 Postcount: 2230 |
|
Marcc |
|
|
Return to top of page · Post #: 12 · Written at 9:19:01 PM on 27 October 2023.
|
|
|
|
Location: Wangaratta, VIC
Member since 21 February 2009 Member #: 438 Postcount: 5715 |
|
On working out how to get it apart, I would be considering what I had to do, to eliminate that little bit of treachery. |
|
|
Return to top of page · Post #: 13 · Written at 9:22:45 PM on 29 October 2023.
|
|
|
|
Administrator
Location: Naremburn, NSW
Member since 15 November 2005 Member #: 1 Postcount: 7624 |
|
Photo uploaded to Post 10. ‾‾‾‾‾‾‾‾‾‾‾‾‾‾‾‾‾‾‾‾‾‾‾‾‾‾‾‾‾‾‾‾‾‾‾‾‾‾‾‾‾‾‾‾‾‾‾‾‾‾‾‾‾‾‾‾‾‾‾‾‾‾‾‾‾‾‾‾ A valve a day keeps the transistor away... |
|
|
Return to top of page · Post #: 14 · Written at 10:11:44 PM on 29 October 2023.
|
|
|
|
Location: Hill Top, NSW
Member since 18 September 2015 Member #: 1801 Postcount: 2254 |
|
Robbert is yours the large one or the small one. |
|
|
Return to top of page · Post #: 15 · Written at 1:48:56 PM on 3 November 2023.
|
|
|
|
Location: Latham, ACT
Member since 21 February 2015 Member #: 1705 Postcount: 2230 |
|
Robbert I seem to remember you need some 2A5s |
|
|
« Back ·
1 ·
Next »
|
|
|
You need to be a member to post comments on this forum.
|
|
Sign In
Vintage Radio and Television is proudly brought to you by an era where things were built with pride and made to last.
DISCLAIMER: Valve radios and televisions contain voltages that can deliver lethal shocks. You should not attempt to work on a valve radio or other electrical appliances unless you know exactly what you are doing and have gained some experience with electronics and working around high voltages. The owner, administrators and staff of Vintage Radio & Television will accept no liability for any damage, injury or loss of life that comes as a result of your use or mis-use of information on this website. Please read our Safety Warning before using this website.
WARNING: Under no circumstances should you ever apply power to a vintage radio, television or other electrical appliance you have acquired without first having it checked and serviced by an experienced person. Also, at no time should any appliance be connected to an electricity supply if the power cord is damaged. If in doubt, do not apply power.
Shintara - Keepin' It Real · VileSilencer - Maintain The Rage