
Tech Talk
Forum home - Go back to Tech talk
|
Kriesler 3K00 Circuit Diagram and 3K06A
|
|
|
Return to top of page · Post #: 1 · Written at 9:02:37 AM on 9 August 2019.
|
|
|
|
Location: Sydney, NSW
Member since 22 May 2017 Member #: 2114 Postcount: 120 |
|
Hi |
|
|
Return to top of page · Post #: 2 · Written at 10:57:50 AM on 9 August 2019.
|
|

|
Location: Sydney, NSW
Member since 28 January 2011 Member #: 823 Postcount: 6949 |
|
My copy of the 3K00 schematic contains no component values. |
|
|
Return to top of page · Post #: 3 · Written at 11:44:02 AM on 9 August 2019.
|
|
|
|
Location: Sydney, NSW
Member since 22 May 2017 Member #: 2114 Postcount: 120 |
|
Thanks for looking GTC, I do not think mine is dual wave. No selection switch that I can see. |
|
|
Return to top of page · Post #: 4 · Written at 5:40:20 PM on 9 August 2019.
|
|
|
|
Location: Toongabbie, NSW
Member since 19 November 2015 Member #: 1828 Postcount: 1408 |
|
Hi Captogo, I refurbished a Kriesler 3K15 in Special Projects some years ago. |
|
|
Return to top of page · Post #: 5 · Written at 6:32:23 PM on 9 August 2019.
|
|
|
|
Location: Sydney, NSW
Member since 22 May 2017 Member #: 2114 Postcount: 120 |
|
Hi Fred, 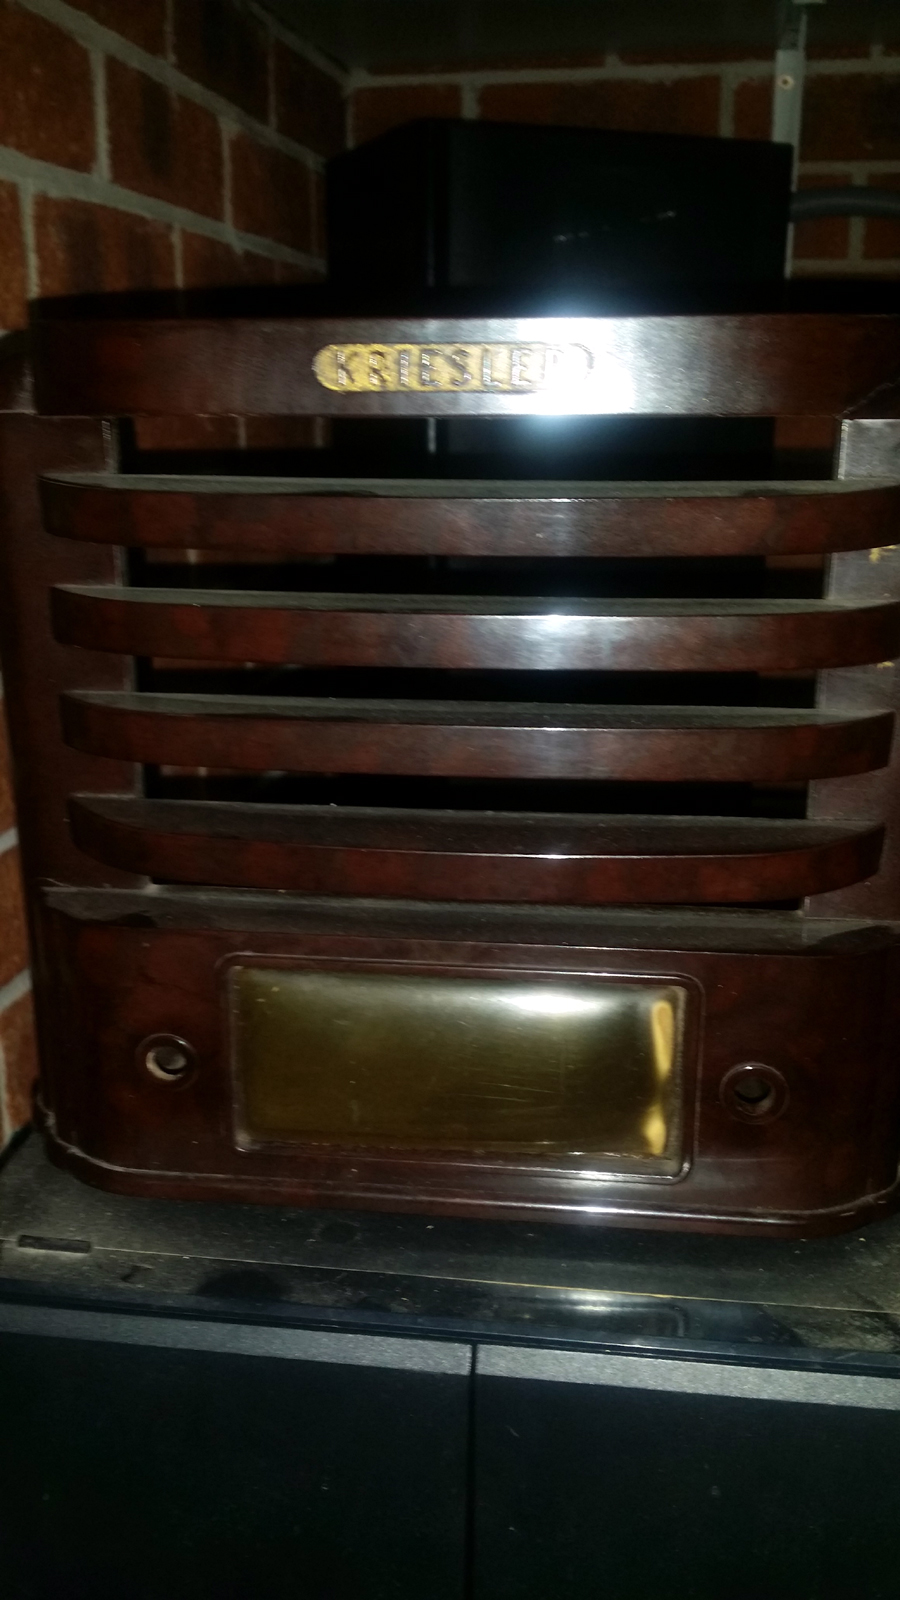 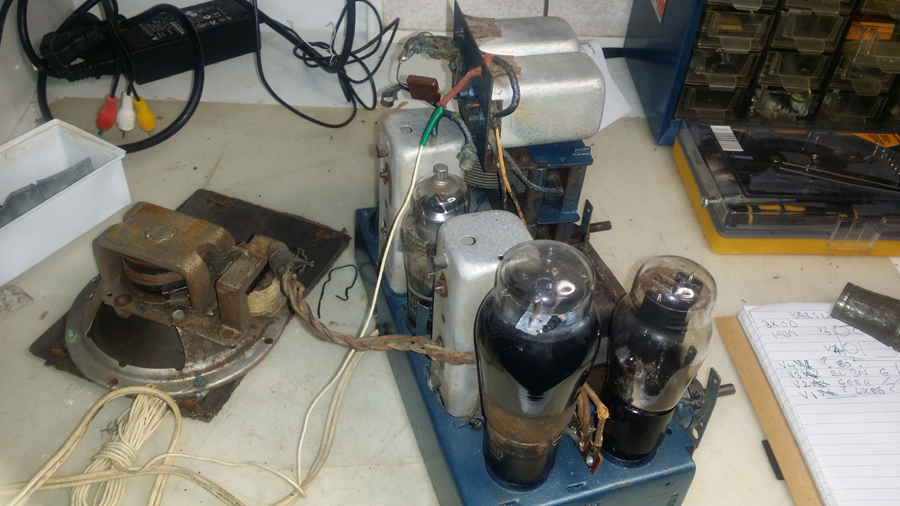 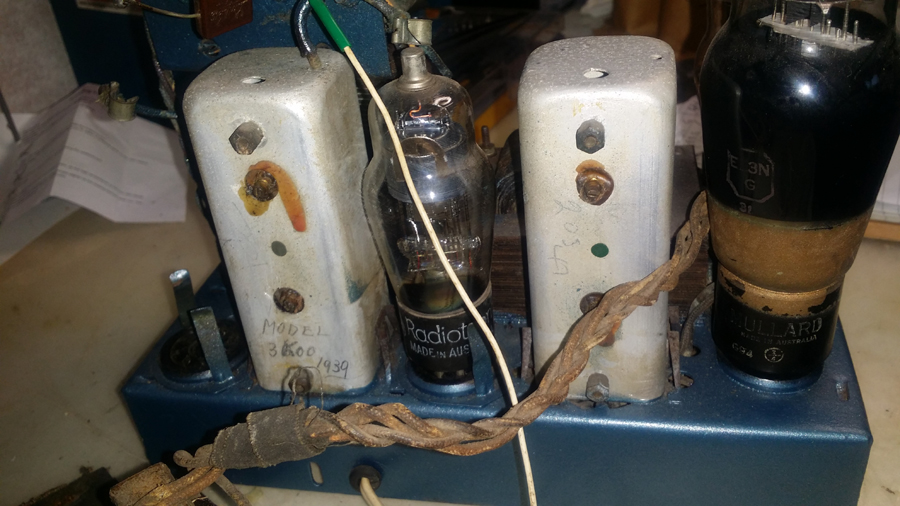 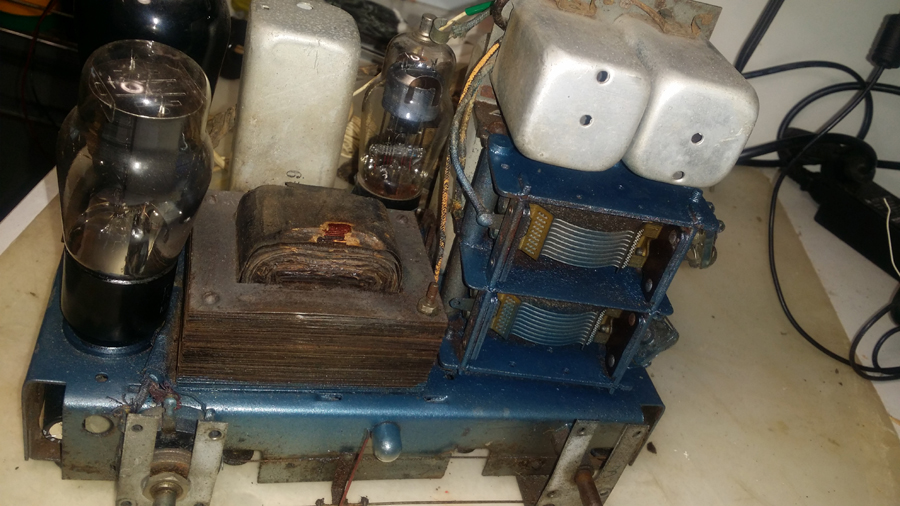 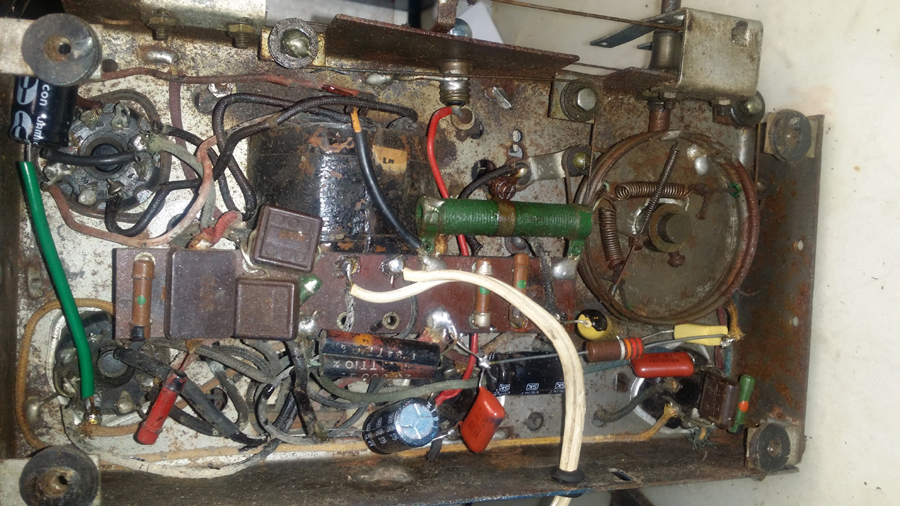 |
|
|
Return to top of page · Post #: 6 · Written at 8:18:17 PM on 9 August 2019.
|
|

|
Location: Wangaratta, VIC
Member since 21 February 2009 Member #: 438 Postcount: 5717 |
|
The pages in AORSM's overlap 3K01 & 3K03, 6K8; EBF2G; EL3NG and #80. Parts are on the bottom of the page for 4K12: 03 & 05 are on the next page and their parts on the first of the XP pages. 6K8 is a Triode Hexode, which is what one would expect in a SW set. |
|
|
Return to top of page · Post #: 7 · Written at 8:48:15 AM on 11 August 2019.
|
|
|
|
Location: Sydney, NSW
Member since 22 May 2017 Member #: 2114 Postcount: 120 |
|
|
|
|
Return to top of page · Post #: 8 · Written at 10:11:26 AM on 11 August 2019.
|
|
|
|
Location: Wangaratta, VIC
Member since 21 February 2009 Member #: 438 Postcount: 5717 |
|
The metalised Philips valves ground pin one. I have found ECH35 in a 6J8 hole. Compare the pin outs. 6A8 and 6J8 will work in one anothers spot, but can cause band spread issues in many Astor sets like JJ. |
|
|
Return to top of page · Post #: 9 · Written at 7:22:15 PM on 11 August 2019.
|
|

|
Administrator
Location: Naremburn, NSW
Member since 15 November 2005 Member #: 1 Postcount: 7630 |
|
Photos uploaded to Post 5. ‾‾‾‾‾‾‾‾‾‾‾‾‾‾‾‾‾‾‾‾‾‾‾‾‾‾‾‾‾‾‾‾‾‾‾‾‾‾‾‾‾‾‾‾‾‾‾‾‾‾‾‾‾‾‾‾‾‾‾‾‾‾‾‾‾‾‾‾ A valve a day keeps the transistor away... |
|
|
Return to top of page · Post #: 10 · Written at 11:33:13 PM on 11 August 2019.
|
|
|
|
Location: Wangaratta, VIC
Member since 21 February 2009 Member #: 438 Postcount: 5717 |
|
I note resistors with metal caps on them, check all of them, the caps can loosen. Paint the ends of the cloth wire or use circuit board lacquer to stop the ends fraying. |
|
|
Return to top of page · Post #: 11 · Written at 10:32:48 AM on 12 August 2019.
|
|
|
|
Location: Sydney, NSW
Member since 22 May 2017 Member #: 2114 Postcount: 120 |
|
Thanks Marcc all very good points, yes I did note the power lead, and I always replace with 3 core and provide a solid anchor. |
|
|
Return to top of page · Post #: 12 · Written at 6:51:20 PM on 12 August 2019.
|
|
|
|
Location: Toongabbie, NSW
Member since 19 November 2015 Member #: 1828 Postcount: 1408 |
|
Hi George, doing well health wise thanks (alive and standing upright)! |
|
|
Return to top of page · Post #: 13 · Written at 7:35:11 PM on 12 August 2019.
|
|
|
|
Location: Sydney, NSW
Member since 22 May 2017 Member #: 2114 Postcount: 120 |
|
Hi Fred, Never can understand why someone would just spray it like that. In fact it is why I bought it as I was considering doing a complete overhaul, due to the simplicity give me some experience and confidence in doing a complete strip down,if it goes pear shape it is not an expensive radio, picked it up cheap. Do love the cabinet shape of this, It is actually Bakelite, the photo I sent Brad was in poor lighting. |
|
|
Return to top of page · Post #: 14 · Written at 10:32:59 AM on 13 August 2019.
|
|

|
Location: Werribee South, VIC
Member since 30 September 2016 Member #: 1981 Postcount: 485 |
|
They even painted over the dial lamp. XXXXwits ! |
|
|
Return to top of page · Post #: 15 · Written at 1:39:22 PM on 13 August 2019.
|
|
|
|
Location: Belrose, NSW
Member since 31 December 2015 Member #: 1844 Postcount: 2710 |
|
The way I did some basket-case Airzone Radiostars some years back was: |
|
|
You need to be a member to post comments on this forum.
|
|
Sign In
Vintage Radio and Television is proudly brought to you by an era where things were built with pride and made to last.
DISCLAIMER: Valve radios and televisions contain voltages that can deliver lethal shocks. You should not attempt to work on a valve radio or other electrical appliances unless you know exactly what you are doing and have gained some experience with electronics and working around high voltages. The owner, administrators and staff of Vintage Radio & Television will accept no liability for any damage, injury or loss of life that comes as a result of your use or mis-use of information on this website. Please read our Safety Warning before using this website.
WARNING: Under no circumstances should you ever apply power to a vintage radio, television or other electrical appliance you have acquired without first having it checked and serviced by an experienced person. Also, at no time should any appliance be connected to an electricity supply if the power cord is damaged. If in doubt, do not apply power.
Shintara - Keepin' It Real · VileSilencer - Maintain The Rage