
Cabinet Repairs
Forum home - Go back to Cabinet Repairs
|
Removing old Varnish
|
|
|
« Back ·
1 ·
Next »
|
|
|
Return to top of page · Post #: 1 · Written at 8:14:38 PM on 22 April 2016.
|
|

|
Location: Latham, ACT
Member since 21 February 2015 Member #: 1705 Postcount: 2245 |
|
Ok guys I am now slowly working on the cabinet of the AWA 608T can you please tell me the name of the best varnish remover . I am sanding it back but I think I need to use varnish stripper to get a better result. Its a long term project but I want to make the best of it. |
|
|
Return to top of page · Post #: 2 · Written at 8:27:19 PM on 22 April 2016.
|
|

|
Administrator
Location: Naremburn, NSW
Member since 15 November 2005 Member #: 1 Postcount: 7638 |
|
I've always used standard paint stripper to remove lacquer and similar finishes, namely Selleys Kwikstrip. You will find that unless the original finish is pretty bad then two or three goes at it will be required before the bulk of it is gone. ‾‾‾‾‾‾‾‾‾‾‾‾‾‾‾‾‾‾‾‾‾‾‾‾‾‾‾‾‾‾‾‾‾‾‾‾‾‾‾‾‾‾‾‾‾‾‾‾‾‾‾‾‾‾‾‾‾‾‾‾‾‾‾‾‾‾‾‾ A valve a day keeps the transistor away... |
|
|
Return to top of page · Post #: 3 · Written at 11:59:16 AM on 23 April 2016.
|
|

|
Location: Tamworth, NSW
Member since 6 April 2012 Member #: 1126 Postcount: 472 |
|
Yes, paint stripper is the go. Sanding is too risky with the fine veneers used. |
|
|
Return to top of page · Post #: 4 · Written at 8:18:08 PM on 27 April 2016.
|
|
|
|
Location: Latham, ACT
Member since 21 February 2015 Member #: 1705 Postcount: 2245 |
|
A Haa the vinegar would probably save a bit of heart ache. I have done a little filling where the veneer was broken off. I am tempted to use a detail sander just to get it flattened out perfectly but wont be going over board. I have it half sanded and looks ok. It's all been hand sanded so far and I will be French polishing it which should be a better than original finish. |
|
|
Return to top of page · Post #: 5 · Written at 2:43:01 AM on 19 July 2016.
|
|
|
|
Location: Latham, ACT
Member since 21 February 2015 Member #: 1705 Postcount: 2245 |
|
Ok guys it seems I will have another little project restoring a 1920s coffin cabinet. The veneer on the lid is damaged and I will be attempting to remove it and put new veneer on it. How do you guys remove old veneer. |
|
|
Return to top of page · Post #: 6 · Written at 12:19:16 PM on 19 July 2016.
|
|

|
Location: Wangaratta, VIC
Member since 21 February 2009 Member #: 438 Postcount: 5730 |
|
A lot of that early so called varnish may actually be a Nitrocellulose based lacquer. I did get a HMV refinished with it, & it was posted at one point. It often goes brownish & cracks. |
|
|
Return to top of page · Post #: 7 · Written at 4:26:04 PM on 19 July 2016.
|
|
|
|
Administrator
Location: Naremburn, NSW
Member since 15 November 2005 Member #: 1 Postcount: 7638 |
|
Carl, I don't suppose you were the lucky bugger that got this? ‾‾‾‾‾‾‾‾‾‾‾‾‾‾‾‾‾‾‾‾‾‾‾‾‾‾‾‾‾‾‾‾‾‾‾‾‾‾‾‾‾‾‾‾‾‾‾‾‾‾‾‾‾‾‾‾‾‾‾‾‾‾‾‾‾‾‾‾ A valve a day keeps the transistor away... |
|
|
Return to top of page · Post #: 8 · Written at 7:04:40 PM on 19 July 2016.
|
|
|
|
Location: Latham, ACT
Member since 21 February 2015 Member #: 1705 Postcount: 2245 |
|
Yep thats the one Brad lol. This one will be a extremely long process but I reckon its worth the effort. I will send pictures shortly. 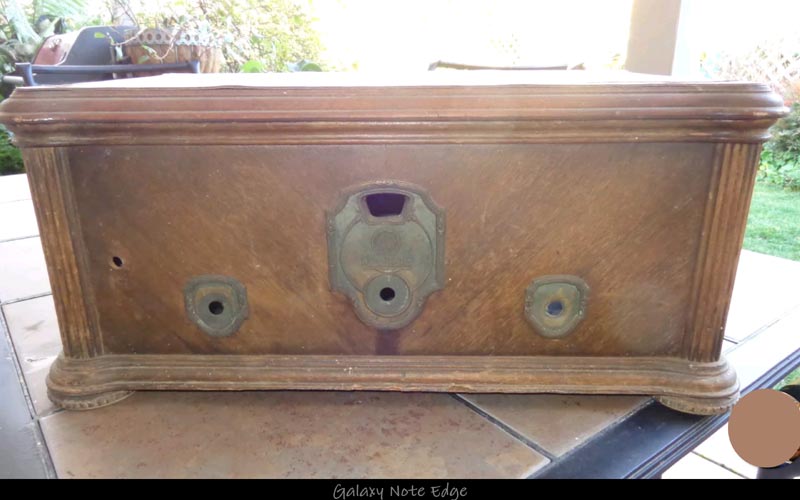 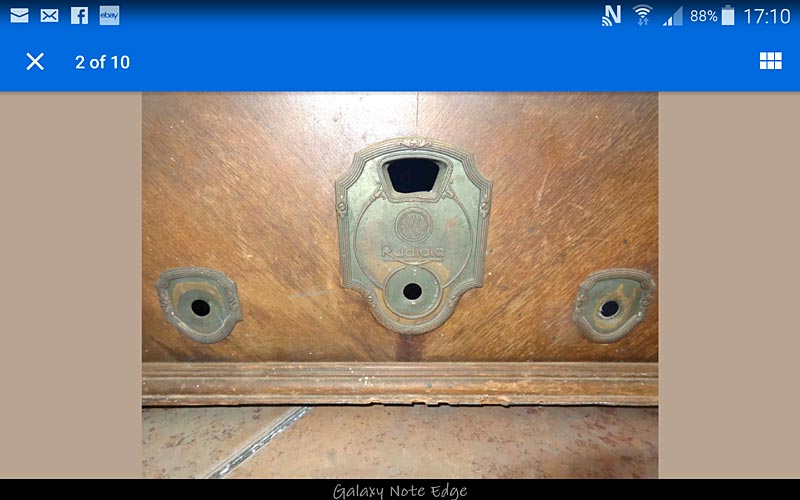  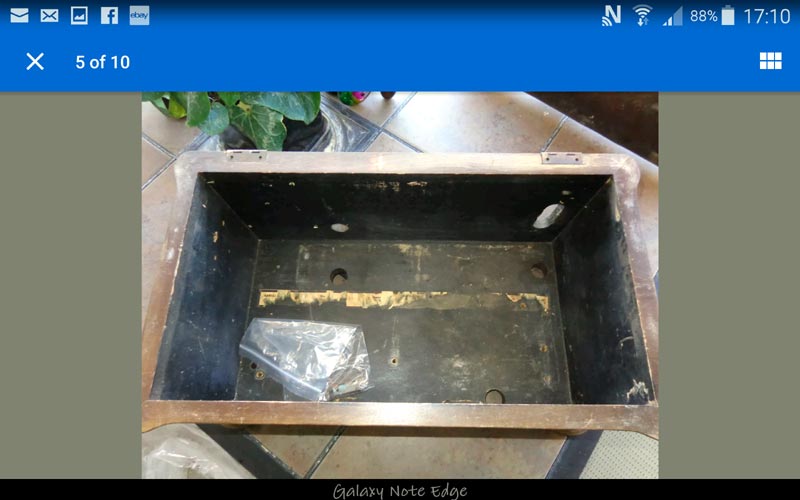 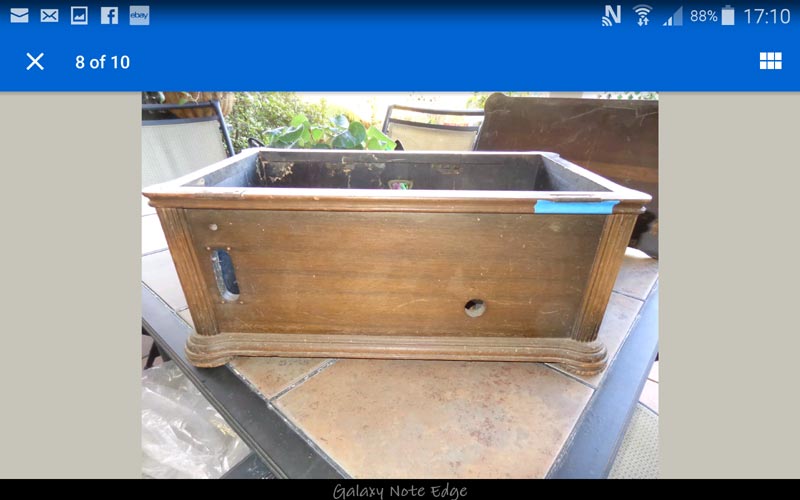 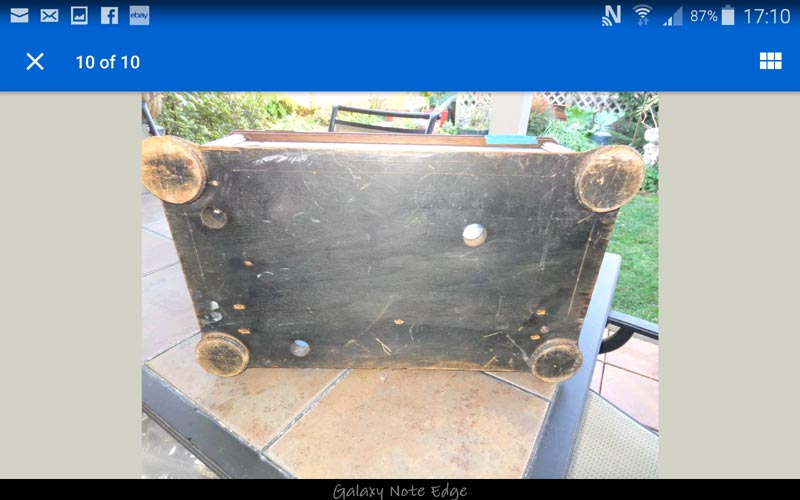 |
|
|
Return to top of page · Post #: 9 · Written at 9:15:13 PM on 19 July 2016.
|
|
|
|
Administrator
Location: Naremburn, NSW
Member since 15 November 2005 Member #: 1 Postcount: 7638 |
|
This is one radio that should be refinished using original methods. This radio is regarded as a true classic. I'd be seeking advice from a radio historian on the best way to go here. This is definitely not a candidate for Estapol. Many 1920s radios were finished with beeswax though others has nitrocellulose lacquer as Marc mentioned. ‾‾‾‾‾‾‾‾‾‾‾‾‾‾‾‾‾‾‾‾‾‾‾‾‾‾‾‾‾‾‾‾‾‾‾‾‾‾‾‾‾‾‾‾‾‾‾‾‾‾‾‾‾‾‾‾‾‾‾‾‾‾‾‾‾‾‾‾ A valve a day keeps the transistor away... |
|
|
Return to top of page · Post #: 10 · Written at 1:14:15 AM on 20 July 2016.
|
|
|
|
Location: Latham, ACT
Member since 21 February 2015 Member #: 1705 Postcount: 2245 |
|
So with the escutcheons how would I polish them up. Are they Brass. |
|
|
Return to top of page · Post #: 11 · Written at 9:08:54 AM on 20 July 2016.
|
|
|
|
Administrator
Location: Naremburn, NSW
Member since 15 November 2005 Member #: 1 Postcount: 7638 |
|
If they are pressed metal then most likely copper, maybe plated with another metal. If they are cast then brass. ‾‾‾‾‾‾‾‾‾‾‾‾‾‾‾‾‾‾‾‾‾‾‾‾‾‾‾‾‾‾‾‾‾‾‾‾‾‾‾‾‾‾‾‾‾‾‾‾‾‾‾‾‾‾‾‾‾‾‾‾‾‾‾‾‾‾‾‾ A valve a day keeps the transistor away... |
|
|
Return to top of page · Post #: 12 · Written at 1:59:12 PM on 20 July 2016.
|
|
|
|
Location: NSW
Member since 10 June 2010 Member #: 681 Postcount: 1408 |
|
Looking at the photo of the rear of the escutcheon, it does look like sheet metal, given the indentations behind the front highlights. It also looks like the copper pressing has been given an "antiquing" finish to make it look like bronze, and then given a light polish to make the highlights show up . Iron sulphide solution can be used for this, available in craft shops, but might be difficult to do as good a job at home . If it is in good condition it may be best to eave it as is, with a gentle clean. |
|
|
Return to top of page · Post #: 13 · Written at 9:58:17 PM on 20 July 2016.
|
|
|
|
Administrator
Location: Naremburn, NSW
Member since 15 November 2005 Member #: 1 Postcount: 7638 |
|
Photos uploaded to Post 8. ‾‾‾‾‾‾‾‾‾‾‾‾‾‾‾‾‾‾‾‾‾‾‾‾‾‾‾‾‾‾‾‾‾‾‾‾‾‾‾‾‾‾‾‾‾‾‾‾‾‾‾‾‾‾‾‾‾‾‾‾‾‾‾‾‾‾‾‾ A valve a day keeps the transistor away... |
|
|
Return to top of page · Post #: 14 · Written at 10:26:21 PM on 22 July 2016.
|
|
|
|
Location: Canberra, ACT
Member since 23 August 2012 Member #: 1208 Postcount: 587 |
|
Nitrocellulose lacquer is very hard to find these days. One reason is that it is considered dangerous due to the solvents in it. |
|
|
Return to top of page · Post #: 15 · Written at 3:05:05 PM on 29 May 2017.
|
|
|
|
Location: Latham, ACT
Member since 21 February 2015 Member #: 1705 Postcount: 2245 |
|
Well People I managed to make some progress with this one. I would love to be able to say that I did it myself but I'm not that good lol. It was done by "The Traditional furniture restorer" in Canberra and Queenbeyan. I have sent some photos. 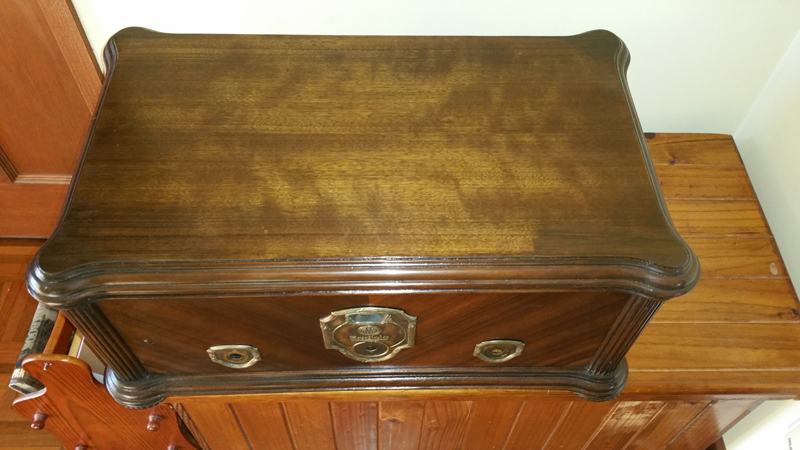 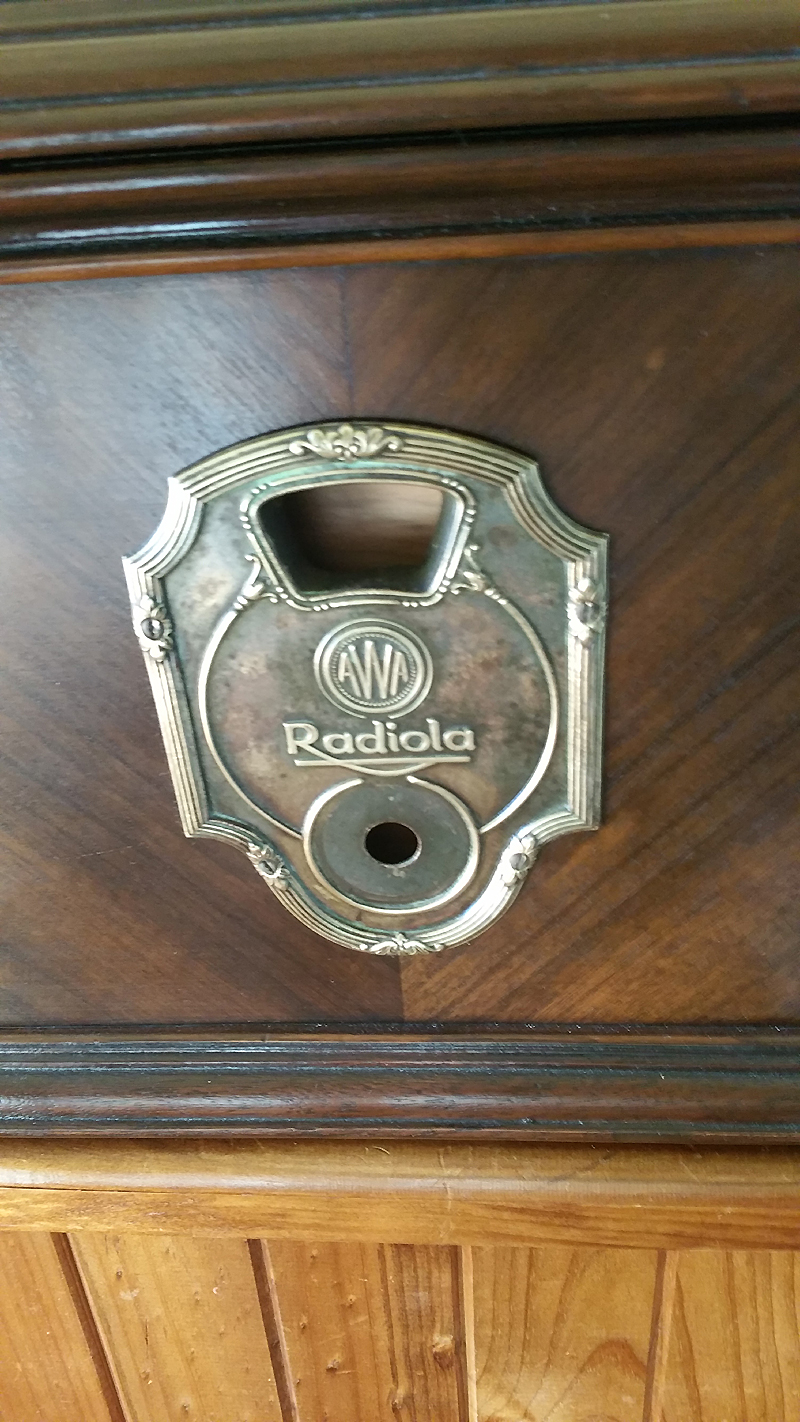 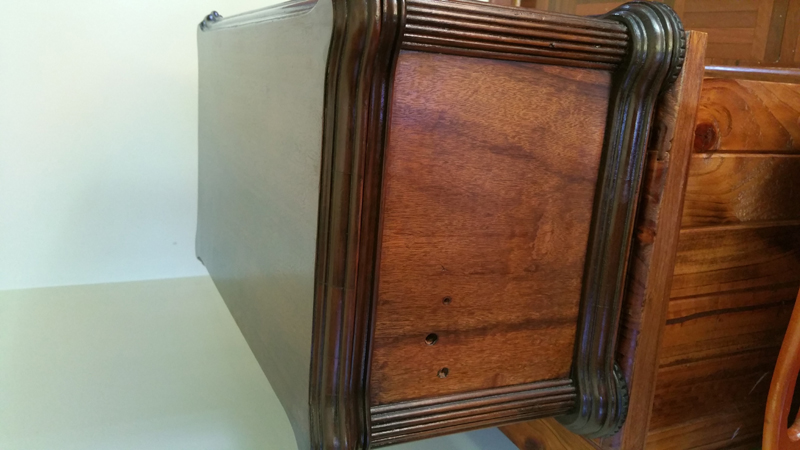 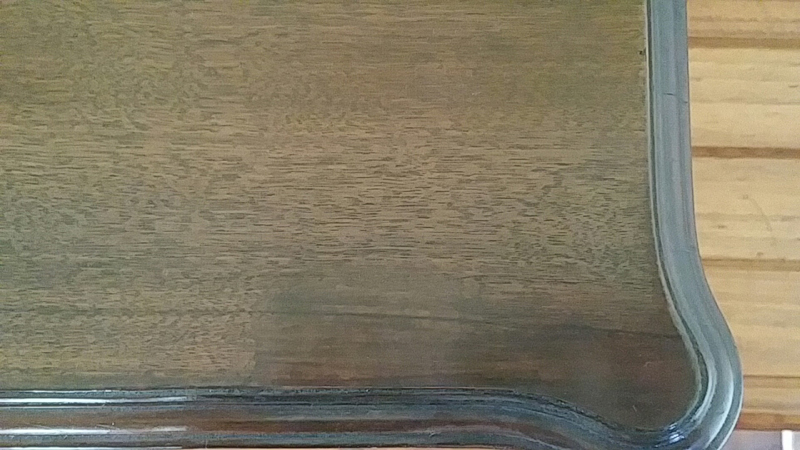 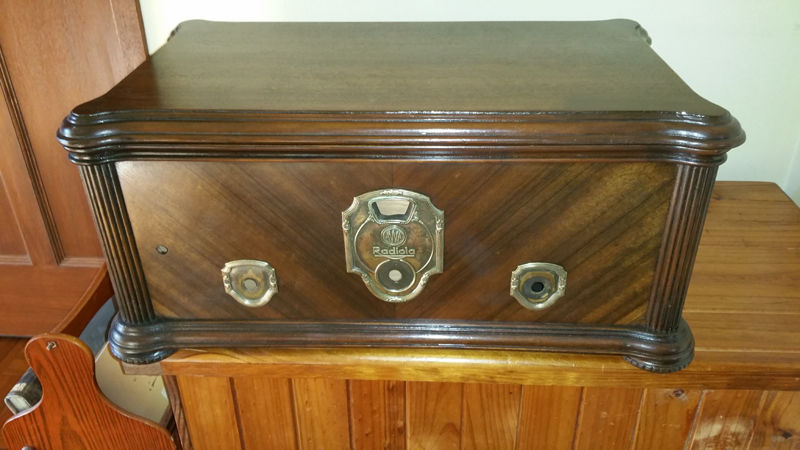 |
|
|
« Back ·
1 ·
Next »
|
|
|
You need to be a member to post comments on this forum.
|
|

Sign In
Vintage Radio and Television is proudly brought to you by an era where things were built with pride and made to last.
DISCLAIMER: Valve radios and televisions contain voltages that can deliver lethal shocks. You should not attempt to work on a valve radio or other electrical appliances unless you know exactly what you are doing and have gained some experience with electronics and working around high voltages. The owner, administrators and staff of Vintage Radio & Television will accept no liability for any damage, injury or loss of life that comes as a result of your use or mis-use of information on this website. Please read our Safety Warning before using this website.
WARNING: Under no circumstances should you ever apply power to a vintage radio, television or other electrical appliance you have acquired without first having it checked and serviced by an experienced person. Also, at no time should any appliance be connected to an electricity supply if the power cord is damaged. If in doubt, do not apply power.
Shintara - Keepin' It Real · VileSilencer - Maintain The Rage