
Cabinet Repairs
Forum home - Go back to Cabinet Repairs
|
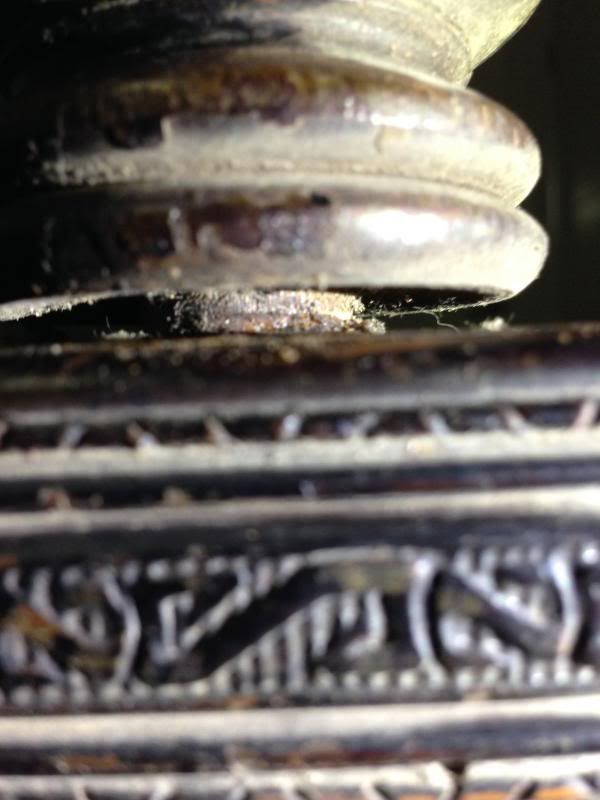
Turned leg joint
|
|
|
« Back ·
1 ·
Next »
|
|
|
Return to top of page · Post #: 1 · Written at 7:24:40 PM on 27 January 2014.
|
|
|
|
Location: Somewhere, USA
Member since 22 October 2013 Member #: 1437 Postcount: 896 |
|
Hi Guys, |
|
|
Return to top of page · Post #: 2 · Written at 11:05:43 PM on 28 January 2014.
|
|
|
|
Location: Canberra, ACT
Member since 23 August 2012 Member #: 1208 Postcount: 587 |
|
Normally the peg (called a dowel) would be a separate piece, and both sides of the joint would have matching holes. |
|
|
Return to top of page · Post #: 3 · Written at 4:04:32 PM on 29 January 2014.
|
|
|
|
Location: Somewhere, USA
Member since 22 October 2013 Member #: 1437 Postcount: 896 |
|
Thanks for the info. |
|
|
Return to top of page · Post #: 4 · Written at 6:29:42 PM on 29 January 2014.
|
|
|
|
Location: Canberra, ACT
Member since 23 August 2012 Member #: 1208 Postcount: 587 |
|
Chances are that if the leg has moved that much, then the glue on one or both ends of the dowel has already broken its bond. What I would do is: |
|
|
Return to top of page · Post #: 5 · Written at 9:03:11 PM on 29 January 2014.
|
|
|
|
Location: Somewhere, USA
Member since 22 October 2013 Member #: 1437 Postcount: 896 |
|
Ok.. if the gap closes, then all is good! |
|
|
Return to top of page · Post #: 6 · Written at 3:50:25 PM on 8 February 2014.
|
|
|
|
Location: Somewhere, USA
Member since 22 October 2013 Member #: 1437 Postcount: 896 |
|
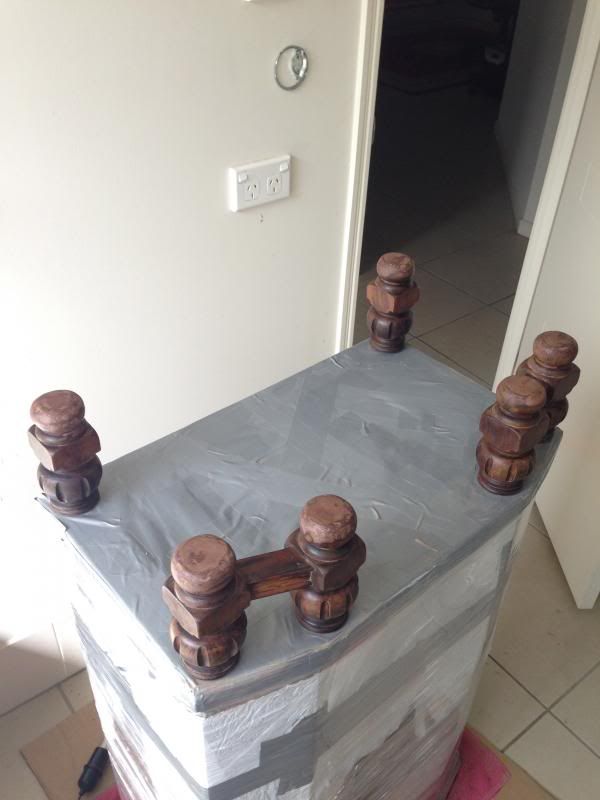
It appears this time it's the manufacturer taking up a few mm slack to keep the cabinet sitting square. |
|
|
Return to top of page · Post #: 7 · Written at 2:41:18 PM on 9 February 2014.
|
|
|
|
Location: Canberra, ACT
Member since 23 August 2012 Member #: 1208 Postcount: 587 |
|
Looks like a pretty good job to me - apart from the unintentional cremation. I wouldn't be wanting to replace metal studs under the feet. If you need additional floor protection or stability, you can put those little protector things that look like miniature dog bowls under the feet. |
|
|
Return to top of page · Post #: 8 · Written at 6:17:30 PM on 9 February 2014.
|
|
|
|
Location: Somewhere, USA
Member since 22 October 2013 Member #: 1437 Postcount: 896 |
|
Thanks for the comment |
|
|
Return to top of page · Post #: 9 · Written at 1:32:38 PM on 10 February 2014.
|
|
|
|
Location: Canberra, ACT
Member since 23 August 2012 Member #: 1208 Postcount: 587 |
|
The only way to match wood grain is to use a small artist's paint brush loaded with wood stain to extend the visible grain lines over the filler, applying as many coats as you think look right before putting the top coat of stain over the whole piece. |
|
|
« Back ·
1 ·
Next »
|
|
|
You need to be a member to post comments on this forum.
|
|

Sign In
Vintage Radio and Television is proudly brought to you by an era where things were built with pride and made to last.
DISCLAIMER: Valve radios and televisions contain voltages that can deliver lethal shocks. You should not attempt to work on a valve radio or other electrical appliances unless you know exactly what you are doing and have gained some experience with electronics and working around high voltages. The owner, administrators and staff of Vintage Radio & Television will accept no liability for any damage, injury or loss of life that comes as a result of your use or mis-use of information on this website. Please read our Safety Warning before using this website.
WARNING: Under no circumstances should you ever apply power to a vintage radio, television or other electrical appliance you have acquired without first having it checked and serviced by an experienced person. Also, at no time should any appliance be connected to an electricity supply if the power cord is damaged. If in doubt, do not apply power.
Shintara - Keepin' It Real · VileSilencer - Maintain The Rage