
General Discussion
Forum home - Go back to General discussion
|
Electrola cocktail cabinet radiogram
|
|
|
« Back ·
1 ·
Next »
|
|
|
Return to top of page · Post #: 1 · Written at 5:50:25 PM on 15 March 2024.
|
|
|
|
Location: TUMBI UMBI, NSW
Member since 14 November 2022 Member #: 2525 Postcount: 42 |
|
Hi everyone, |
|
|
Return to top of page · Post #: 2 · Written at 12:20:51 AM on 16 March 2024.
|
|

|
Location: Wangaratta, VIC
Member since 21 February 2009 Member #: 438 Postcount: 5663 |
|
There is something on the draws of the island bench here that slow them down as they as they are closing. Never really bothered to inspect. |
|
|
Return to top of page · Post #: 3 · Written at 6:51:39 AM on 16 March 2024.
|
|
|
|
Location: Toongabbie, NSW
Member since 19 November 2015 Member #: 1828 Postcount: 1394 |
|
Ben, the Healing 667G radiogram I am slowly working on has exactly that to control the swinging radio set. 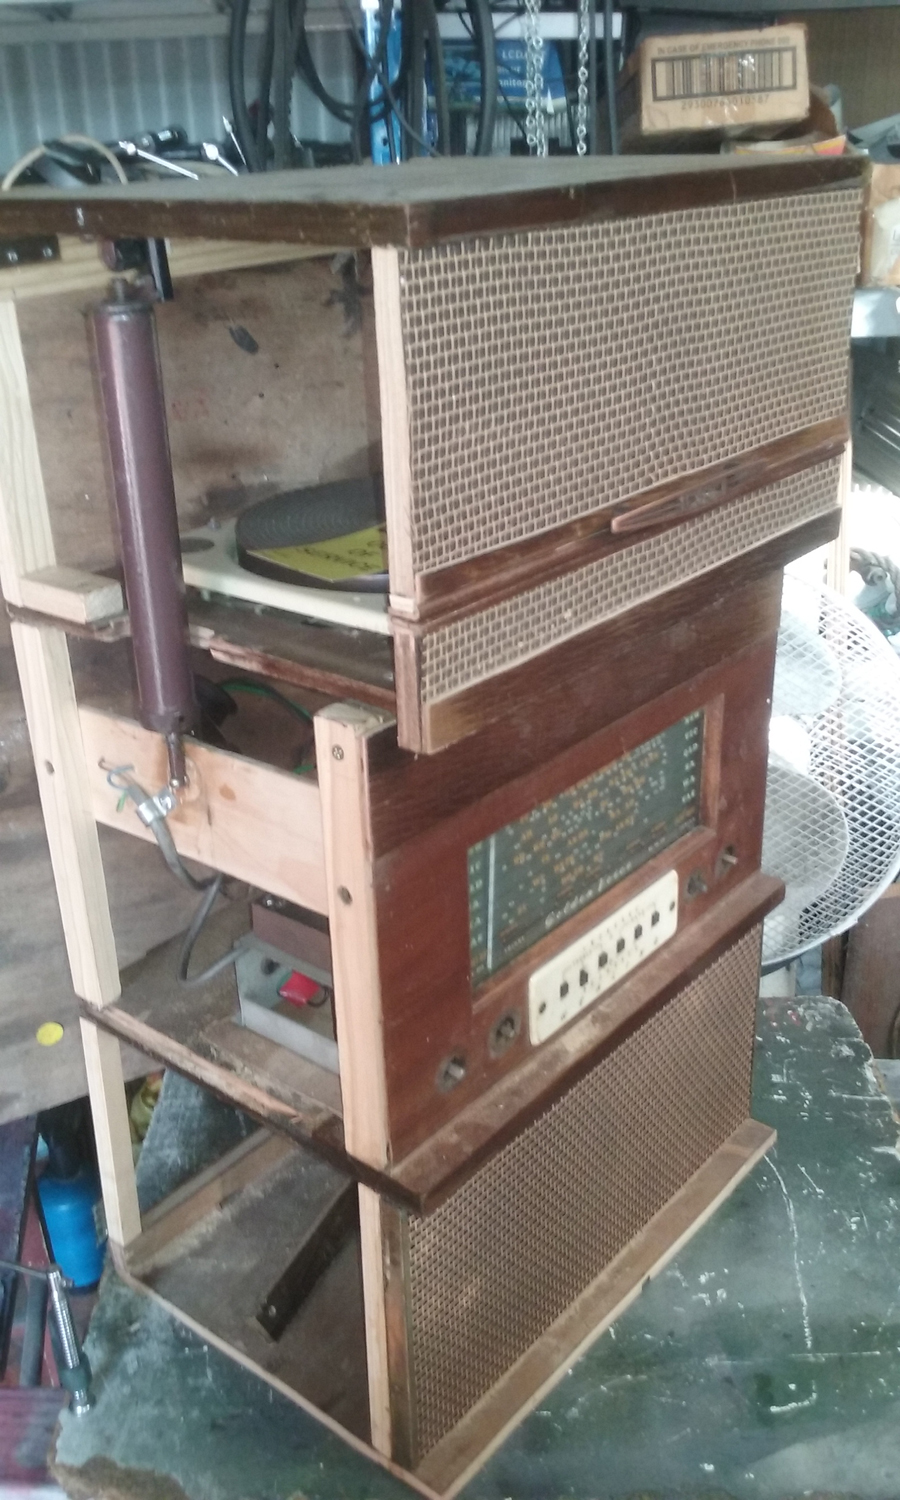 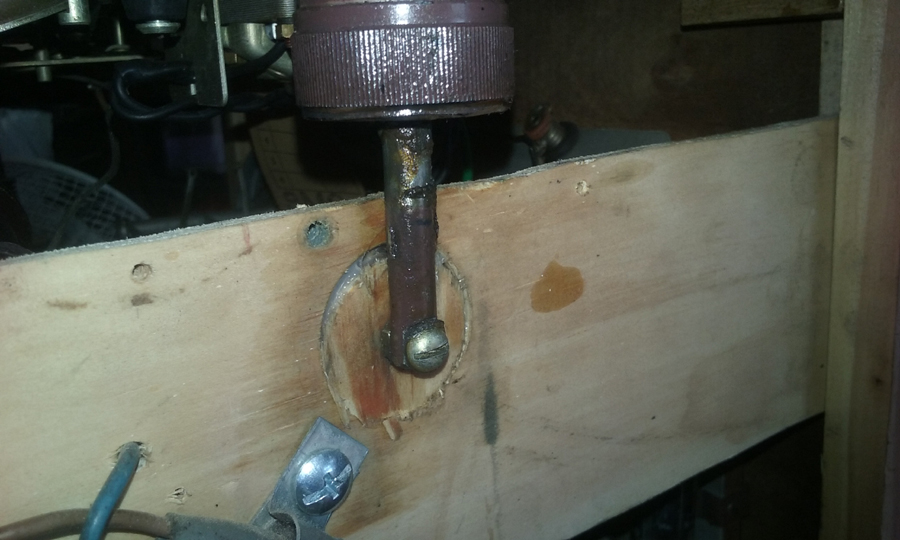 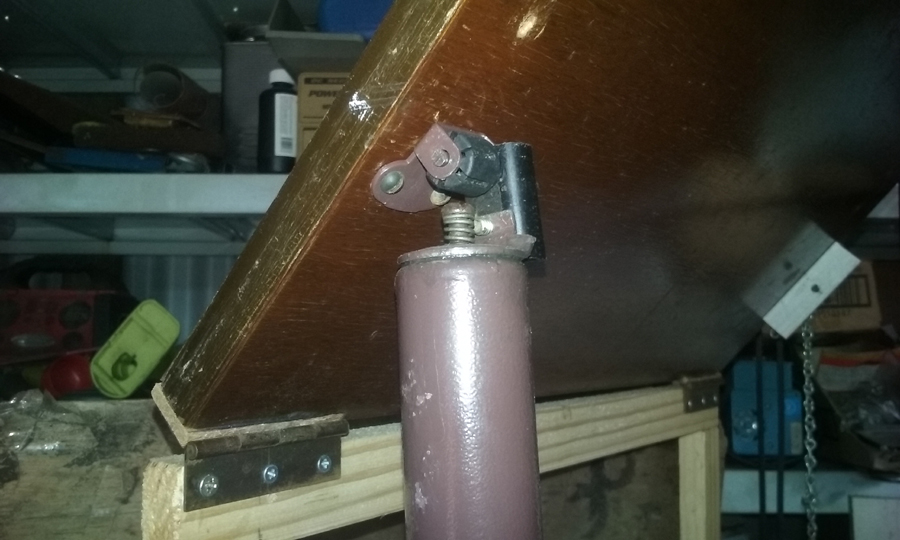 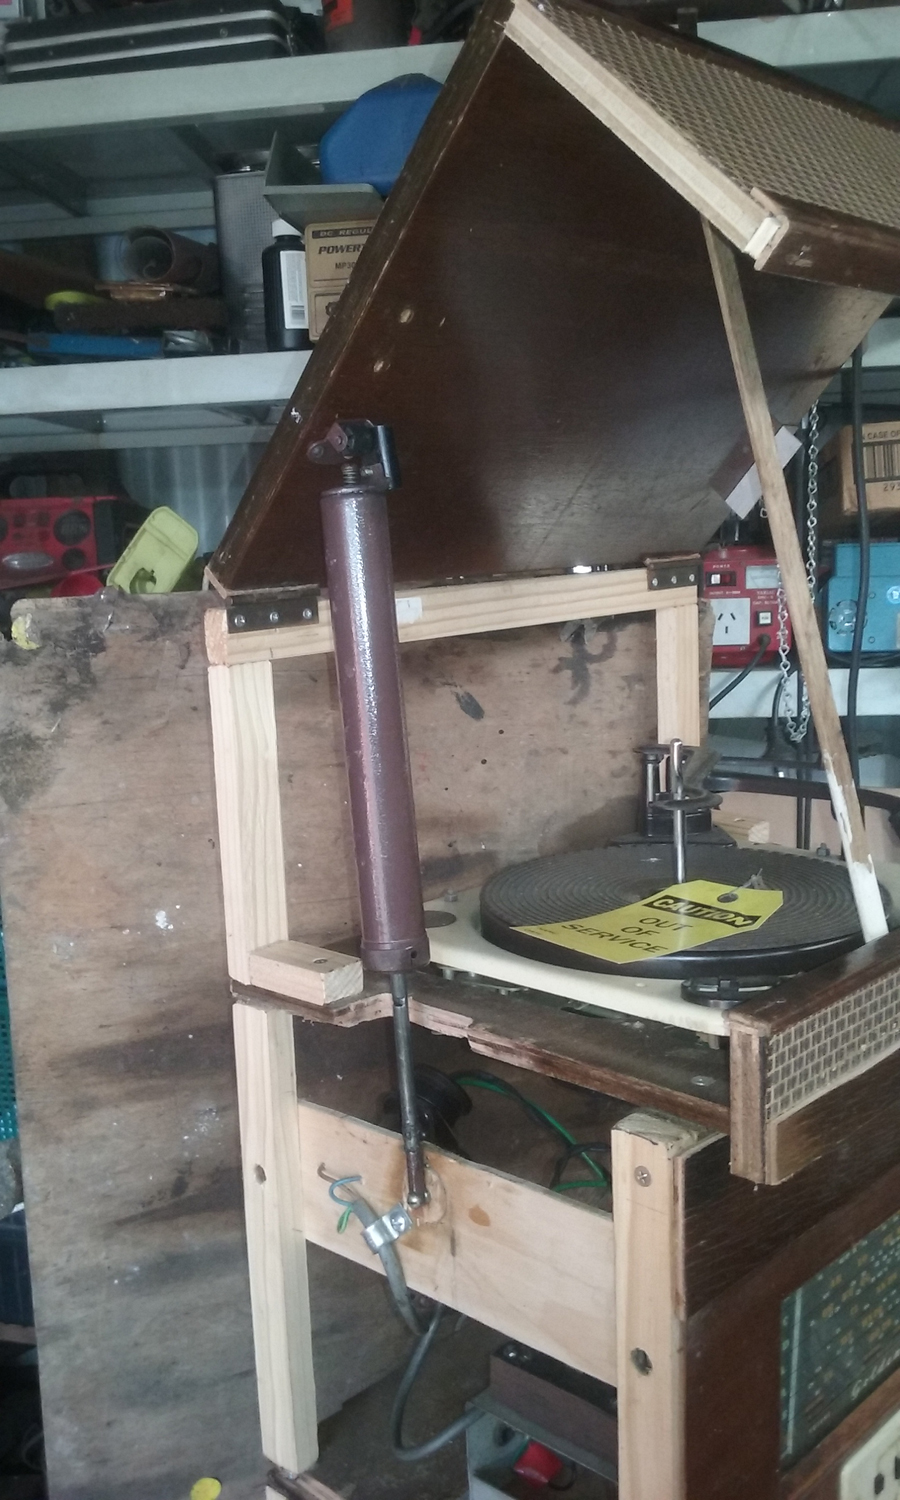 |
|
|
Return to top of page · Post #: 4 · Written at 10:03:32 PM on 16 March 2024.
|
|
|
|
Location: TUMBI UMBI, NSW
Member since 14 November 2022 Member #: 2525 Postcount: 42 |
|
Removing the spring sounds brilliant, the only problem is opening the thing up without damaging it. I'll wait for you photo to be uploaded. |
|
|
Return to top of page · Post #: 5 · Written at 8:18:17 AM on 17 March 2024.
|
|
|
|
Location: Toongabbie, NSW
Member since 19 November 2015 Member #: 1828 Postcount: 1394 |
|
The cylinder will probably be too long to fit in where you are going. |
|
|
Return to top of page · Post #: 6 · Written at 10:19:39 AM on 17 March 2024.
|
|
|
|
Location: Wangaratta, VIC
Member since 21 February 2009 Member #: 438 Postcount: 5663 |
|
For the up you merely have to introduce a mechanical valve I just put a new set in a Spitwater washer from 1992 24mm high 21.8mm dia. Possibly too strong but that, or a flap valve (swing check) would sort that opening issue. |
|
|
Return to top of page · Post #: 7 · Written at 9:29:27 PM on 18 March 2024.
|
|
|
|
Location: TUMBI UMBI, NSW
Member since 14 November 2022 Member #: 2525 Postcount: 42 |
|
I solved the problem. It is the same length as a standard closer. The original can be taken apart. I ripped apart the new one and removed the rod and seal assembly and then put into the old original unit and it is now working very well. No more slamming the radiogram shut. |
|
|
Return to top of page · Post #: 8 · Written at 6:49:32 AM on 19 March 2024.
|
|
|
|
Location: Toongabbie, NSW
Member since 19 November 2015 Member #: 1828 Postcount: 1394 |
|
Thats the way to go! |
|
|
Return to top of page · Post #: 9 · Written at 11:15:48 AM on 19 March 2024.
|
|
|
|
Location: TUMBI UMBI, NSW
Member since 14 November 2022 Member #: 2525 Postcount: 42 |
|
The rubber seal in the old one was hard as a rock. Looks like new one has the same diameter tube. I would have never found a replacement rubber seal for the old one but the new one uses an O-ring which should be easer to replace in future. |
|
|
Return to top of page · Post #: 10 · Written at 6:10:50 PM on 19 March 2024.
|
|

|
Administrator
Location: Naremburn, NSW
Member since 15 November 2005 Member #: 1 Postcount: 7590 |
|
Photos uploaded to Post #3. ‾‾‾‾‾‾‾‾‾‾‾‾‾‾‾‾‾‾‾‾‾‾‾‾‾‾‾‾‾‾‾‾‾‾‾‾‾‾‾‾‾‾‾‾‾‾‾‾‾‾‾‾‾‾‾‾‾‾‾‾‾‾‾‾‾‾‾‾ A valve a day keeps the transistor away... |
|
|
Return to top of page · Post #: 11 · Written at 12:02:37 PM on 20 March 2024.
|
|
|
|
Location: TUMBI UMBI, NSW
Member since 14 November 2022 Member #: 2525 Postcount: 42 |
|
Thanks for sending in your images. Mine was very fiddly and took many attempts until I got it to work. It is close to vertical but had to be angled a little. also the entire length of the pump was required which helped make things difficult. It's all working well and hopefully it will stay like that for a long time. |
|
|
Return to top of page · Post #: 12 · Written at 8:52:19 PM on 20 March 2024.
|
|
|
|
Location: Toongabbie, NSW
Member since 19 November 2015 Member #: 1828 Postcount: 1394 |
|
Mechanical things are great fun are they not? |
|
|
Return to top of page · Post #: 13 · Written at 9:43:47 PM on 20 March 2024.
|
|
|
|
Location: Belrose, NSW
Member since 31 December 2015 Member #: 1844 Postcount: 2677 |
|
Yeah Fred, I like to make things by hand too. |
|
|
Return to top of page · Post #: 14 · Written at 10:29:27 PM on 20 March 2024.
|
|
|
|
Location: TUMBI UMBI, NSW
Member since 14 November 2022 Member #: 2525 Postcount: 42 |
|
Ian I hear you loud and clear. I have Parkinsons as well, makes things that much harder. |
|
|
« Back ·
1 ·
Next »
|
|
|
You need to be a member to post comments on this forum.
|
|
Sign In
Vintage Radio and Television is proudly brought to you by an era where things were built with pride and made to last.
DISCLAIMER: Valve radios and televisions contain voltages that can deliver lethal shocks. You should not attempt to work on a valve radio or other electrical appliances unless you know exactly what you are doing and have gained some experience with electronics and working around high voltages. The owner, administrators and staff of Vintage Radio & Television will accept no liability for any damage, injury or loss of life that comes as a result of your use or mis-use of information on this website. Please read our Safety Warning before using this website.
WARNING: Under no circumstances should you ever apply power to a vintage radio, television or other electrical appliance you have acquired without first having it checked and serviced by an experienced person. Also, at no time should any appliance be connected to an electricity supply if the power cord is damaged. If in doubt, do not apply power.
Shintara - Keepin' It Real · VileSilencer - Maintain The Rage