
General Discussion
Forum home - Go back to General discussion
|
Battery Radio Power Supply reprise
|
|
|
Return to top of page · Post #: 1 · Written at 5:18:30 PM on 20 May 2017.
|
|
|
|
Location: Belrose, NSW
Member since 31 December 2015 Member #: 1844 Postcount: 2710 |
|
For a whole lot of reasons, so much time has passed since I first mentioned this, I thought I'd better make it a new post. I had a lot of interest when I raised this last time so I've had 50 sets of boards made – locally, not in China! 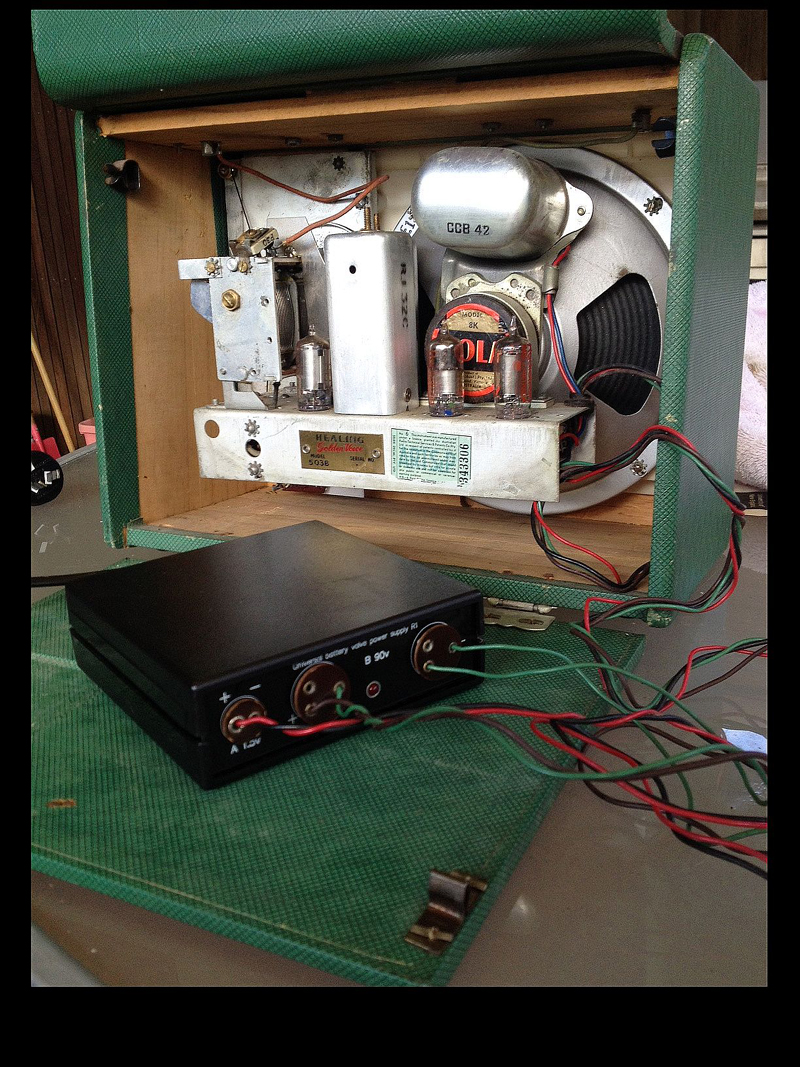 Pic 2 – View of assembled unit, no case. 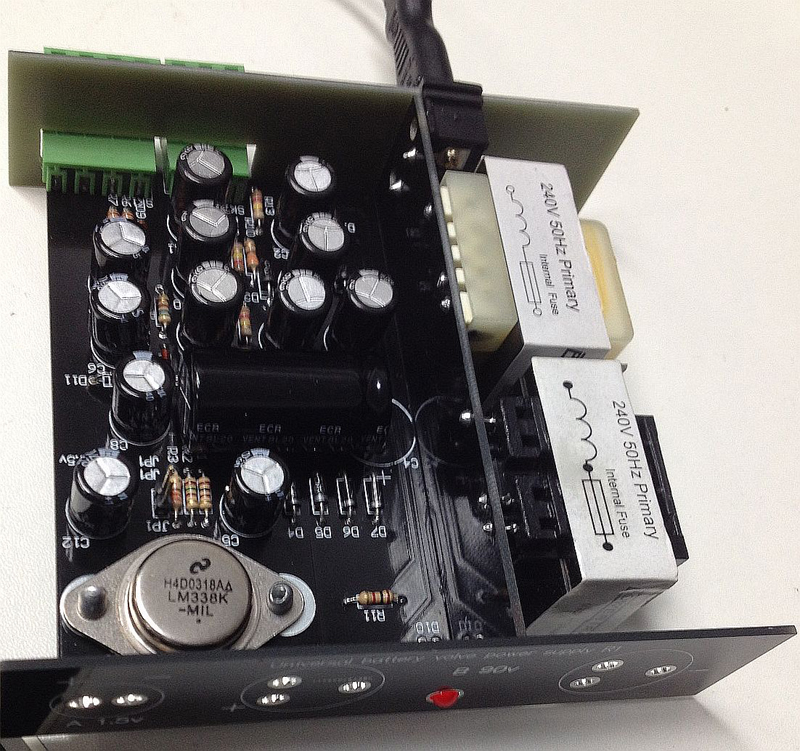 Pic 3 – Just the boards. 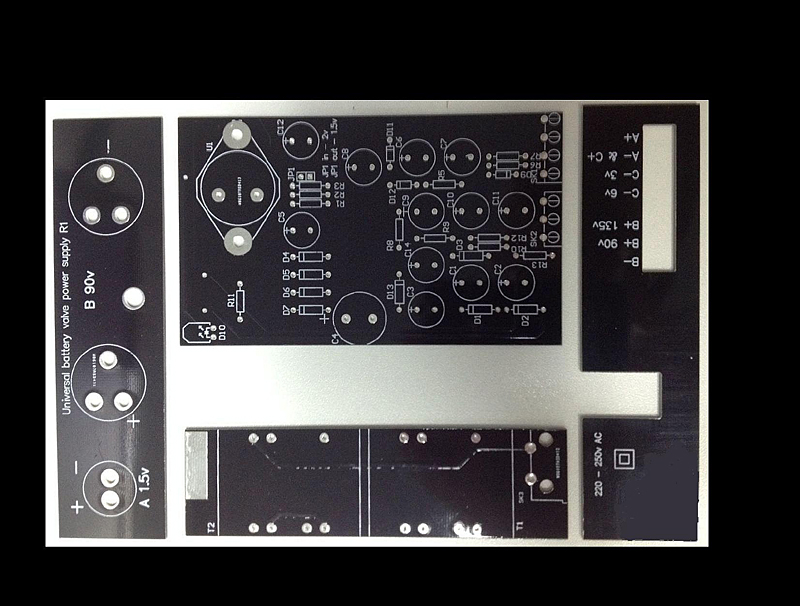 Battery Power Supply Parts List Email me with what you'd like! |
|
|
Return to top of page · Post #: 2 · Written at 7:48:41 PM on 20 May 2017.
|
|

|
Location: Sydney, NSW
Member since 28 January 2011 Member #: 823 Postcount: 6949 |
|
Using vias for the sockets is a neat trick. |
|
|
Return to top of page · Post #: 3 · Written at 8:16:45 PM on 20 May 2017.
|
|

|
Location: Hill Top, NSW
Member since 18 September 2015 Member #: 1801 Postcount: 2254 |
|
Very nice. I'm very tempted to get a complete kit. |
|
|
Return to top of page · Post #: 4 · Written at 8:31:41 PM on 20 May 2017.
|
|
|
|
Location: Belrose, NSW
Member since 31 December 2015 Member #: 1844 Postcount: 2710 |
|
GTC: |
|
|
Return to top of page · Post #: 5 · Written at 12:11:35 AM on 22 May 2017.
|
|
|
|
Location: Hill Top, NSW
Member since 18 September 2015 Member #: 1801 Postcount: 2254 |
|
Email sent. |
|
|
Return to top of page · Post #: 6 · Written at 7:00:57 AM on 22 May 2017.
|
|

|
Location: Tamworth, NSW
Member since 6 April 2012 Member #: 1126 Postcount: 472 |
|
Email sent |
|
|
Return to top of page · Post #: 7 · Written at 4:43:46 PM on 10 June 2017.
|
|
|
|
Location: Tamworth, NSW
Member since 6 April 2012 Member #: 1126 Postcount: 472 |
|
Mine turned up yesterday morning. I build one last night. Havent tried it with a radio yet, but it went together reasonably easily. |
|
|
Return to top of page · Post #: 8 · Written at 2:32:31 PM on 16 June 2017.
|
|
|
|
Location: Hill Top, NSW
Member since 18 September 2015 Member #: 1801 Postcount: 2254 |
|
Waiting for it to arrive.. |
|
|
Return to top of page · Post #: 9 · Written at 3:14:12 PM on 16 June 2017.
|
|
|
|
Location: Belrose, NSW
Member since 31 December 2015 Member #: 1844 Postcount: 2710 |
|
Hi Robbbert |
|
|
Return to top of page · Post #: 10 · Written at 7:08:38 PM on 17 June 2017.
|
|
|
Location: Latham, ACT
Member since 21 February 2015 Member #: 1705 Postcount: 2230 |
|
I would be very interested in getting a complete kit .I will need one for my AWA C54 when its finished. |
|
|
Return to top of page · Post #: 11 · Written at 9:02:30 PM on 17 June 2017.
|
|
|
|
Location: Belrose, NSW
Member since 31 December 2015 Member #: 1844 Postcount: 2710 |
|
I still have a few kits from the first batch. |
|
|
Return to top of page · Post #: 12 · Written at 3:40:52 PM on 21 June 2017.
|
|
|
|
Location: Hill Top, NSW
Member since 18 September 2015 Member #: 1801 Postcount: 2254 |
|
Box has arrived, thanks. Won't get time to look at it (or even open it) until next week at the earliest. |
|
|
Return to top of page · Post #: 13 · Written at 5:18:12 PM on 21 June 2017.
|
|
|
|
Location: Kempsey, NSW
Member since 6 December 2016 Member #: 2019 Postcount: 37 |
|
Hi, |
|
|
Return to top of page · Post #: 14 · Written at 9:34:41 AM on 22 June 2017.
|
|
|
|
Location: Belrose, NSW
Member since 31 December 2015 Member #: 1844 Postcount: 2710 |
|
Yes although designed primarily for 1.5 and 2V filament radios the supply can be easily modified to suit your radio. |
|
|
Return to top of page · Post #: 15 · Written at 3:06:52 PM on 24 June 2017.
|
|
|
|
Location: Latham, ACT
Member since 21 February 2015 Member #: 1705 Postcount: 2230 |
|
Well I have bought three of these little units today and I can tell you that they seem very easy to assemble. I regard myself as a layman and not a tech and I find the way they are designed that they are very easy to understand. Thats the sign of great design. I met Ian today and had a very enjoyable conversation about our favourite subject "Vintage Radio" |
|
|
You need to be a member to post comments on this forum.
|
|
Sign In
Vintage Radio and Television is proudly brought to you by an era where things were built with pride and made to last.
DISCLAIMER: Valve radios and televisions contain voltages that can deliver lethal shocks. You should not attempt to work on a valve radio or other electrical appliances unless you know exactly what you are doing and have gained some experience with electronics and working around high voltages. The owner, administrators and staff of Vintage Radio & Television will accept no liability for any damage, injury or loss of life that comes as a result of your use or mis-use of information on this website. Please read our Safety Warning before using this website.
WARNING: Under no circumstances should you ever apply power to a vintage radio, television or other electrical appliance you have acquired without first having it checked and serviced by an experienced person. Also, at no time should any appliance be connected to an electricity supply if the power cord is damaged. If in doubt, do not apply power.
Shintara - Keepin' It Real · VileSilencer - Maintain The Rage